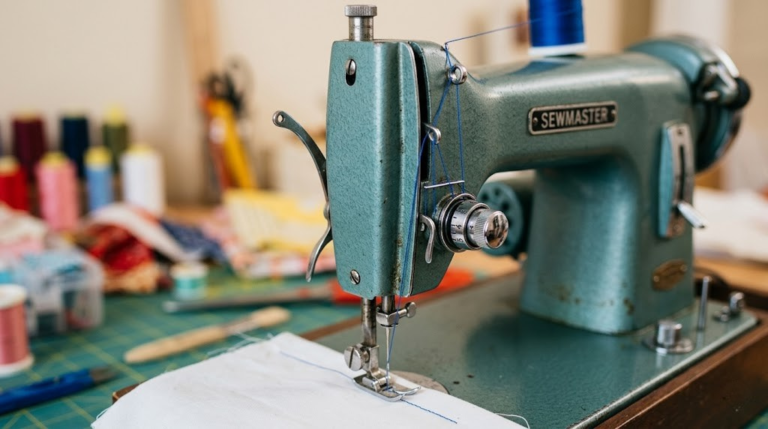
✦ The Complete Sewist’s Reference
Sewing Machine Stitch Types Explained: Every Stitch, Every Use, Every Fabric
From your very first straight stitch to decorative embroidery patterns — this is the only stitch guide you’ll ever need. Master your machine, choose the right stitch every single time, and take your sewing from functional to flawless.
Different stitch types produce radically different results — learning each one opens up an entirely new world of sewing possibilities.
Every sewing machine stitch exists for a reason. Whether you’re reinforcing a stress point, finishing a raw edge, sewing an invisible hem, or embroidering a monogram — there is a stitch engineered precisely for that job. The problem? Most sewists use only two or three stitches out of the thirty, sixty, or even 300-plus stitches their machine offers. This guide changes that forever.
Understanding sewing machine stitch types isn’t just about knowing their names. It’s about understanding the mechanics behind each stitch, recognizing the fabric conditions that call for one stitch over another, and knowing how to dial in your length and width settings so every seam comes out perfect. Whether you’re learning how to use a sewing machine for the very first time or you’re an experienced sewist who wants to unlock your machine’s hidden potential, this reference guide will transform the way you sew.
We’re covering everything from the humble straight stitch — the bedrock of all garment construction — through zigzag and stretch stitches for knit fabrics, decorative stitches for heirloom work, and the specialized stitches found only on computerized sewing machines. We’ll also show you exactly how each stitch looks, how it’s formed, and what can go wrong when your settings are off.
Sit down, grab your seam ripper (you won’t need it after this), and let’s get into every stitch your sewing machine has to offer.
01 — How Sewing Machine Stitches Are Formed
Before we catalog every stitch type, it pays enormous dividends to understand how a stitch is actually made. Stitches on a sewing machine don’t work the way hand stitches do. There is no simple needle-passes-through-fabric-and-pulls-thread motion happening. The mechanics are far more elegant — and more fragile — than most sewists realize.
The Lockstitch Principle
The vast majority of home sewing machine stitches are lockstitches. A lockstitch uses two threads: the needle thread (which comes from the spool on top) and the bobbin thread (which lives in the bobbin case underneath the needle plate). Here’s what happens in a fraction of a second during each stitch:
- The needle pierces the fabric and carries the needle thread downward.
- As the needle rises back up, a small loop of thread is left behind below the fabric.
- The rotating hook in the bobbin assembly catches that loop.
- The hook pulls the needle thread loop around the bobbin thread.
- Both threads are pulled up and locked together inside the fabric layers — creating the characteristic locked stitch that can’t be pulled apart from either side.
This locking action is what makes machine stitches so durable. Unlike a hand stitch where only one thread is doing all the work, a lockstitch creates a symmetric, interlocked structure. This is also why proper thread tension is so critical — if the bobbin tension and needle tension are not balanced, the lock point migrates to one side and you see loops on either the top or bottom of your fabric. For more on this, see our guide on thread nesting under fabric and how to fix it.
The Role of Stitch Length and Width
Every stitch on your machine is ultimately a variation of these two parameters — plus the pattern in which the needle moves:
- Stitch length controls how far the feed dogs advance the fabric between each needle penetration. A longer stitch means more fabric travels between each needle strike; a shorter stitch means the needle hits fabric more frequently per inch.
- Stitch width controls how far the needle swings left and right (only applicable for stitches with lateral movement). A wider setting creates a wider zigzag or decorative pattern.
Our dedicated article on stitch width vs. length goes deep on this topic, but we’ll reference specific ideal settings throughout this guide for each stitch type.
Stitch Count: What Does It Really Mean?
When machine manufacturers say a model has “300 stitches” or “800 built-in stitches,” most of those numbers represent variations of a smaller number of fundamental stitch types. The same zigzag stitch with a width of 2 vs. a width of 5 might be counted separately. The same decorative pattern in mirror image counts as two stitches. The core stitch families are far more limited — and that’s what this guide teaches you: the families, not the variations.
02 — The Straight Stitch: Workhorse of the Sewing World
If sewing machine stitches were a solar system, the straight stitch would be the sun — everything else orbits around it. It is the most fundamental, most used, and most versatile stitch on any sewing machine. Understanding its nuances will make every other stitch easier to master.
What Is the Straight Stitch?
The straight stitch is exactly what it sounds like: the needle moves up and down in a single vertical line, creating a row of evenly spaced lockstitch points in a straight path. There is no lateral needle movement. The only variable you control is the stitch length.
Straight Stitch Length Settings: A Practical Breakdown
| Length Setting | Measurement (mm) | Best Used For | Avoid Using For |
|---|---|---|---|
| Shortest / Fine | 0.5 – 1.0 mm | Reinforcement at seam ends, stitching-in-place, appliqué corners | Long seams — perforates fabric, weakens seam |
| Short | 1.5 – 2.0 mm | Delicate fabrics (silk, chiffon), curved seams, topstitching detail work | Heavy denim or canvas — needle drag too frequent |
| Standard | 2.0 – 2.5 mm | General garment construction, most woven fabrics, cotton quilting | — (This is your default setting) |
| Medium | 2.5 – 3.5 mm | Medium to heavy wovens, denim, canvas, bag-making | Sheer fabrics — gaps too visible |
| Long / Basting | 4.0 – 6.0 mm | Basting stitches, gathering, temporary holds | Permanent seams — pulls out too easily |
Variations of the Straight Stitch
While the basic straight stitch is simple, several important variations build upon it:
Variation 01
Standard Straight Stitch
The default setting on every machine. Needle position center, length 2.0–2.5mm. Your go-to for all woven fabric construction.
Variation 02
Reinforced Straight Stitch
Sometimes called the “triple straight stitch” — the machine sews forward, backward, then forward again in the same line, tripling the stitch density. Used for stress points like bag handles and jeans waistbands.
Variation 03
Needle Position Straight Stitch
Adjusting the needle to left, center-left, center-right, or right position changes where your stitch falls relative to the presser foot edge — essential for precise edgestitching and topstitching.
Variation 04
Basting Stitch
A straight stitch set at maximum length (4–6mm). Used for temporarily holding fabric in place before permanent stitching or for gathering. Always sewn with reduced tension for easy removal.
Variation 05
Micro Stitch / Stay Stitch
A very short straight stitch (1.5–2.0mm) sewn on bias-cut or curved edges to prevent stretching before seaming. Not decorative — purely structural.
Variation 06
Topstitch
A straight stitch sewn on the right side (outside) of a garment for decoration, structure, or to secure seam allowances. Typically 3.0–3.5mm length with heavier topstitching thread for visual impact.
Straight Stitch: When It’s Right and When It’s Not
✓ Where Straight Stitch Excels
- All woven fabric garment construction
- Quilting, piecing, and joining blocks
- Topstitching visible detail lines
- Inserting zippers (see our guide on how to sew a zipper)
- Attaching pockets and flaps
- Edge-stitching seam allowances flat
- Understitching facings
✗ Where Straight Stitch Fails
- Knit and stretch fabrics (will pop on wearing)
- Seams under heavy stress without reinforcement
- Seam finishing on wovens (frays freely)
- Hems on t-shirts or activewear
- Elasticated waistbands
If you’re experiencing problems with your straight stitch — skipped stitches, uneven tension, thread nesting — these are among the most common machine issues. Our comprehensive sewing machine troubleshooting guide covers all of these causes and solutions in exhaustive detail.

✦ Essential Supply — Top Thread Pick
Gutermann Sew-All Thread Set — 40 Colors, Perfect for Every Stitch Type
Using quality thread is the fastest way to improve every stitch. This set covers every project in your sewing queue. See also: our best cotton threads roundup.
Check Price on Amazon03 — The Zigzag Stitch: Versatility Champion
If the straight stitch is the sun, the zigzag is the moon — essential, always present, and governing an enormous range of sewing functions. The zigzag stitch is the second most important stitch on any machine and the gateway to every other stitch that involves lateral needle movement.
How the Zigzag Stitch Works
Unlike the straight stitch, the zigzag stitch’s needle moves laterally as well as vertically. The needle strikes the fabric at the right, then moves to the left for the next stitch, then back to the right, creating the characteristic V-pattern. This lateral movement is what gives zigzag stitches their key properties: stretch, width, and seam finishing ability.
Zigzag Width and Length Settings
The zigzag stitch has two independently adjustable parameters:
- Width (0–7mm typically): Controls how far the needle swings left to right. A wider zigzag stretches more and covers more area — ideal for seam finishing. A narrow zigzag has less stretch but is less visible.
- Length: Controls the density. A very short length with wide width creates a dense satin stitch (virtually no fabric visible between stitches). Longer length is more open, more flexible.
| Width | Length | Best Application |
|---|---|---|
| 1.0–1.5mm | 1.5–2.5mm | Narrow zigzag for delicate seam finishing on fine fabrics; slight stretch application |
| 3.0–4.0mm | 2.0–3.0mm | Standard seam finishing on medium wovens; knit fabric seaming; appliqué raw-edge securing |
| 5.0–7.0mm | 2.5–4.0mm | Wide seam finishing on fraying fabrics; elasticating; attaching lace trim |
| 4.0–7.0mm | 0.3–0.8mm | Satin stitch (nearly closed) for appliqué edge finishing, monogramming, decorative borders |
Top Uses for the Zigzag Stitch
1. Seam Finishing
One of the most common uses for zigzag is finishing raw seam allowances on woven fabrics to prevent fraying. Run a zigzag stitch along the edge of each seam allowance individually (after seaming) or together (before seaming, serger-style). A width of 3–4mm with length 2.5mm is typical. For a deeper discussion of seam allowances and why finishing matters, see our complete guide to seam allowance.
2. Sewing Knit and Stretch Fabrics
Woven fabrics are dimensionally stable — they don’t stretch much. Knit fabrics are the opposite, and a standard straight stitch will simply snap at the seam when the fabric is worn or washed. A zigzag stitch, by contrast, has inherent stretch because of its V-shape. A narrow zigzag (width 1.5, length 2.5) is often sufficient for moderate knit stretch. For high-stretch fabrics like activewear, you’ll want to move to a dedicated stretch stitch (covered in the next section).
3. Appliqué
Attaching fabric shapes to a background fabric using a tight zigzag (near-satin stitch) encases and protects the raw edge of the appliqué piece while also visually defining the design. This is one of the most satisfying uses of the zigzag stitch in decorative sewing.
4. Attaching Elastic
A wide zigzag stitch (4–5mm) is the standard method for stitching elastic directly to fabric. The zigzag must stretch with the elastic, and a wide setting ensures the stitch has enough lateral movement to accommodate the elastic’s contraction without snapping. Alternatively, many sewists use a three-step zigzag for this purpose (covered below).
5. Reinforcing Stress Points
A short, wide zigzag placed over a previous straight stitch at a stress point (like the base of a pocket or a belt loop) creates a very strong, redundant reinforcement. Often called a “tack” stitch when extremely short in length.
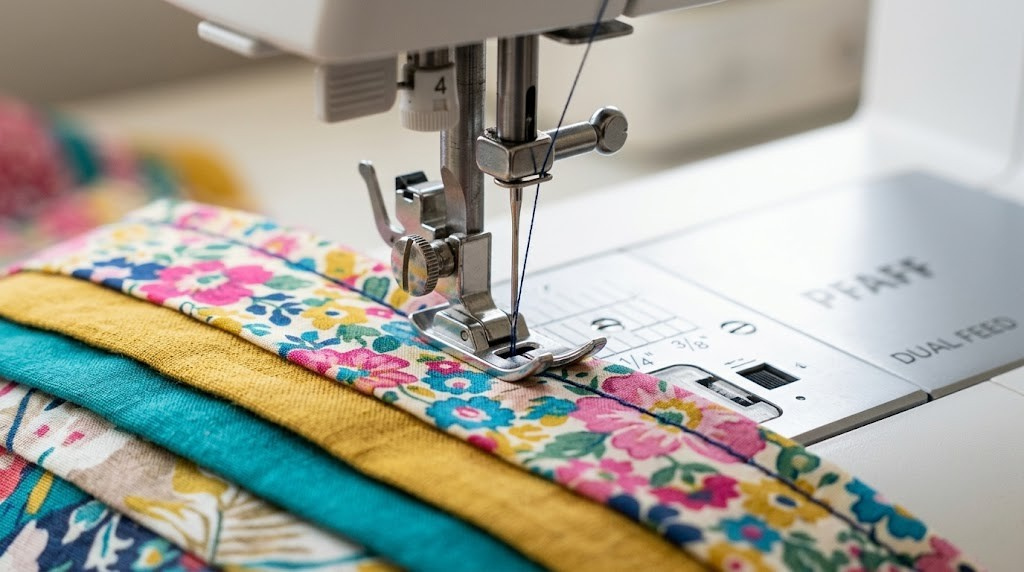
04 — Stretch Stitches: Sewing Knits and Performance Fabrics
Stretch stitches are the specialized family of stitches designed specifically for knit fabrics, jerseys, spandex blends, swimwear, and activewear. They go beyond what a simple zigzag can offer, building in dramatic stretch capacity while still maintaining a clean, professional appearance. If you sew garments made from anything that stretches, this section is critical.
The Lightning Stitch (Triple Straight Stitch)
Sometimes called the stretch straight stitch or triple stitch, this stitch sews forward three needle penetrations, then backward one, then forward three again — effectively tripling the number of thread connections per inch. The result is a stitch that has dramatically more stretch than a single straight stitch and is extremely strong. It’s visible as a slightly textured straight line.
Best uses: Stress points on knit garments (necklines, armscyes, crotch seams), hems on jeans and denim, reinforcing bag seams. See our deep dive on which machine handles heavy-duty denim best.
The Three-Step Zigzag (Multi-Stitch Zigzag)
This is the zigzag stitch’s more sophisticated sibling. Instead of a single needle penetration at each left and right point, the machine makes three small stitches as it moves across to each side before returning. This produces a stitch that looks like a gentle “W” when viewed closely, and it distributes the stretch force across a wider area without concentrating stress at any single thread junction.
Best uses: Attaching elastic directly to fabric, elastic casings that need maximum stretch retention, swimwear, athletic waistbands, bra straps.
The Overlock Stitch (On Non-Serger Machines)
Many mid-range sewing machines include a simulated overlock stitch — a combination stitch that simultaneously sews the seam AND finishes the edge in one pass. It usually looks like a zigzag alongside a straight stitch, mimicking the two-thread chain of a real serger. It’s not as clean as true serger overlocking, but it’s a practical option when a serger isn’t available. For true overlock results, you’ll want a dedicated serger machine.
The Stretch Blind Hem Stitch
A specialized stitch for hemming knit fabrics invisibly. It consists of several straight stitches (or sometimes small zigzags) followed by one stitch that swings wide to catch just a thread or two of the folded fabric — creating a nearly invisible hem from the right side. Proper technique requires a specific presser foot and careful fabric alignment. This stitch is one of the least-practiced but highest-impact stitches in garment sewing.
The Honeycomb Stitch
A heavily built-in stretch stitch found on more advanced machines. It creates an interlocking hexagonal pattern that allows even greater lateral and longitudinal stretch than a standard zigzag. It’s particularly popular for swimwear and lingerie construction where maximum stretch retention is required.

✦ Best for Knits & Stretch Fabrics
Singer Heavy Duty 4452 — Built-In Stretch Stitches, Powerful Motor
Heavy motor, multiple stretch stitch options, and the power to sew through multiple layers of knit fabric without skipping. Read our full Singer 4452 review.
Check Price on Amazon05 — Utility Stitches: The Unsung Workhorses
Utility stitches are the stitches that solve specific, practical sewing problems. They’re not glamorous. They don’t appear in embroidery showcases. But they are the stitches that hold bags together under heavy load, attach zippers professionally, reinforce the hem of a pair of jeans through a thousand wash cycles, and allow you to sew through five layers of thick denim without skipped stitches.
The Blind Hem Stitch
This is perhaps the most valuable utility stitch for garment sewists, and the most misunderstood. The blind hem stitch alternates several straight stitches with one zigzag or swing stitch. When executed correctly with a blind hem foot, the zigzag stitch catches only a few threads from the folded hem allowance — making the stitching virtually invisible from the right side of the garment.
Stitch settings for blind hem: Width 1.5–2.5mm, length 2.0–2.5mm. Always use a dedicated blind hem presser foot. Test on a scrap before committing to the garment hem.
The Overcasting Stitch
Not to be confused with an overlock stitch, the overcasting stitch is a single-needle stitch designed to wrap over the edge of fabric, simulating the look of hand overcasting. It creates a wave or blanket-stitch pattern along the raw edge. Less effective than a serger overlock, but useful when you need edge finishing without trimming width.
The Honeycomb Stitch (Utility Version)
This is different from the decorative honeycomb stitch. The utility honeycomb creates an extremely stretchy, strong seam ideal for waistbands and areas that need to stretch and recover. It looks like a series of interlocking rectangles and is found on higher-end machines.
The Vari-Overlock Stitch
A multi-purpose stitch that combines elements of a zigzag and an overcast stitch. It sews a seam and finishes the edge simultaneously, similar to a serger, but with a single needle. Best used on medium-weight wovens where you want to combine steps for efficiency.
The Elastic Straight Stitch (Stretch Stitch)
Designed specifically for attaching pre-stretched elastic or for sewing onto highly elastic materials like spandex. Some machines label this as “elastic stitch” explicitly. It functions similar to the triple straight stitch but is calibrated for maximum elastic accommodation.
06 — Seam Finishing Stitches: Keeping Fraying Under Control
In sewing, a seam is only as professional as its finish. Raw, fraying seam allowances inside a garment are the mark of a rushed project. They also weaken the seam over time as the fraying progresses toward the stitching line. Seam finishing stitches solve this problem — and there are more options than most sewists realize.
If you’ve ever wondered why your sewing machine isn’t sewing clean seam finishes, the issue is often a combination of needle condition and stitch selection. Let’s cover the main options.
Method 1: Zigzag Seam Finish
The most widely used seam finish on home machines. Run a medium zigzag (width 3mm, length 2.5mm) along each raw edge of the seam allowance. Works on most fabrics but can add bulk on heavy materials and may tunnel on lightweight silks.
Method 2: Overcast / Overlocking Stitch
A specialized overcasting stitch built into most modern sewing machines loops thread over the cut edge, imitating a serger. Uses a specific overcasting presser foot with a wire guide that prevents the fabric edge from tunneling as the stitch is applied. Far cleaner result than a raw zigzag on the edge — particularly on medium knits and stretch fabrics.
Method 3: Pink-and-Stitch
Cut seam allowances with pinking shears (the zigzag-edged scissors) and run a straight stitch 3mm from the edge. The pinking prevents fraying on tightly woven fabrics with minimal fraying tendency. Not effective on loosely woven fabrics like linen or canvas. We recommend using quality sewing scissors for precision cutting before finishing.
Method 4: French Seam
This is a construction technique rather than a machine stitch, but it’s worth noting: a French seam encases the raw edges completely within the seam itself, leaving no raw edges visible from either side. Used on sheer and delicate fabrics where an internal seam allowance would shadow through. Requires no special stitch — just precise straight stitching in two passes.
Method 5: Flat-Felled Seam
Another construction technique producing a flat seam with two rows of topstitching on the right side — think the side seams of jeans. Extremely strong and fully encases raw edges. Requires careful pressing and topstitching precision.
| Seam Finish | Best Fabric Types | Equipment Needed | Professional Rating |
|---|---|---|---|
| Zigzag stitch | Most wovens, medium knits | Standard machine + standard foot | ★★★☆☆ |
| Overcast stitch | Medium wovens, stretch fabrics | Machine + overcasting foot | ★★★★☆ |
| Serger overlock | All fabric types | Serger machine | ★★★★★ |
| Pink & stitch | Tightly woven, low-fray | Pinking shears | ★★☆☆☆ |
| French seam | Sheer, delicate, light wovens | Standard machine (precision needed) | ★★★★★ |
| Flat-felled seam | Denim, canvas, workwear | Machine + careful pressing | ★★★★☆ |

✦ Level Up Your Seam Finishing
Brother 1034D Serger — Professional Overlocking for Every Fabric
Stop fighting with zigzag seam finishes. A serger handles all of it in a single pass, faster and cleaner. Essential for anyone sewing knits or garments regularly.
Check Price on Amazon08 — Quilting Stitches: Precision, Pattern, and Performance
Quilting is one of the most technically demanding and most rewarding applications of the sewing machine. The stitches involved range from basic straight stitching (for block assembly) to complex free-motion patterns (for quilting the sandwich together). Understanding quilting-specific stitches and settings is fundamental for anyone who works with fabric layers, batting, and backing.
For more specialized information on quilting tools and setup, browse our dedicated resources on best quilting rulers, best batting for quilting, and best quilting cutting mats.
Straight-Line Quilting (Walking Foot Quilting)
The most fundamental quilting stitch is simply a straight stitch, but applied through three layers (top, batting, backing) rather than two. The key technical challenge is that three layers of fabric plus batting move differently under the presser foot — the bottom layers travel faster than the top, causing puckering unless a walking foot (even feed foot) is used.
Settings for straight-line quilting: Length 3.0–3.5mm (longer stitch length is traditional in quilting, showing well through all layers), walking foot, needle appropriate to the batting weight (usually a 75/11 or 80/12 quilting needle with a slightly tapered point).
Quilting Stitch Patterns
| Pattern Name | Tool Required | Skill Level | Visual Effect |
|---|---|---|---|
| Straight grid / cross-hatch | Walking foot + quilting ruler guide | Beginner | Classic, timeless, very flat |
| Stitch-in-the-ditch | Walking foot or special ditch foot | Beginner–Intermediate | Invisible — follows seam lines exactly |
| Echo quilting | Walking foot + spacing bar | Intermediate | Concentric shapes expanding from motif center |
| Free-motion stippling | Free-motion / darning foot + dropped feed dogs | Intermediate–Advanced | Flowing, irregular puzzle-piece texture |
| Free-motion feathers | Free-motion foot | Advanced | Elegant, traditional curved feather motifs |
| Programmed decorative quilting | Computerized machine auto-patterns | Intermediate | Machine-perfect repeating motifs |
Free-Motion Quilting: Dropping the Feed Dogs
Free-motion quilting is a category of quilting where the feed dogs are lowered (or covered), removing automatic fabric advance from the equation. You now control the direction AND the speed at which fabric moves under the needle by moving the quilt sandwich with your hands. The result can be any line, curve, or shape you can draw — it’s essentially drawing with a sewing machine needle and thread.
Free-motion quilting requires a darning or free-motion presser foot (a small open-toe foot with a spring mechanism), a machine that can drop its feed dogs, and considerable practice. The relationship between machine speed and hand movement determines stitch length — consistent, even stitches require you to move your hands and run the machine at coordinated speeds. For machine-specific guidance on feed dog features, see our article on what is a feed dog on a sewing machine.
What Stitch Length Setting for Quilting?
Standard quilting guidance recommends 8–12 stitches per inch for quilting through batting, which translates to approximately 2.0–3.0mm stitch length on your machine’s metric dial. Too short and you’re perforating the batting excessively, weakening the structure. Too long and the stitch doesn’t hold well through repeated washing. Test on a sample sandwich before committing to a quilt.
For free-motion quilting, your “stitch length” is determined by how fast you move the fabric relative to the machine’s stitching speed — there’s no dial setting for length in that mode. Practice is the only setting that matters.
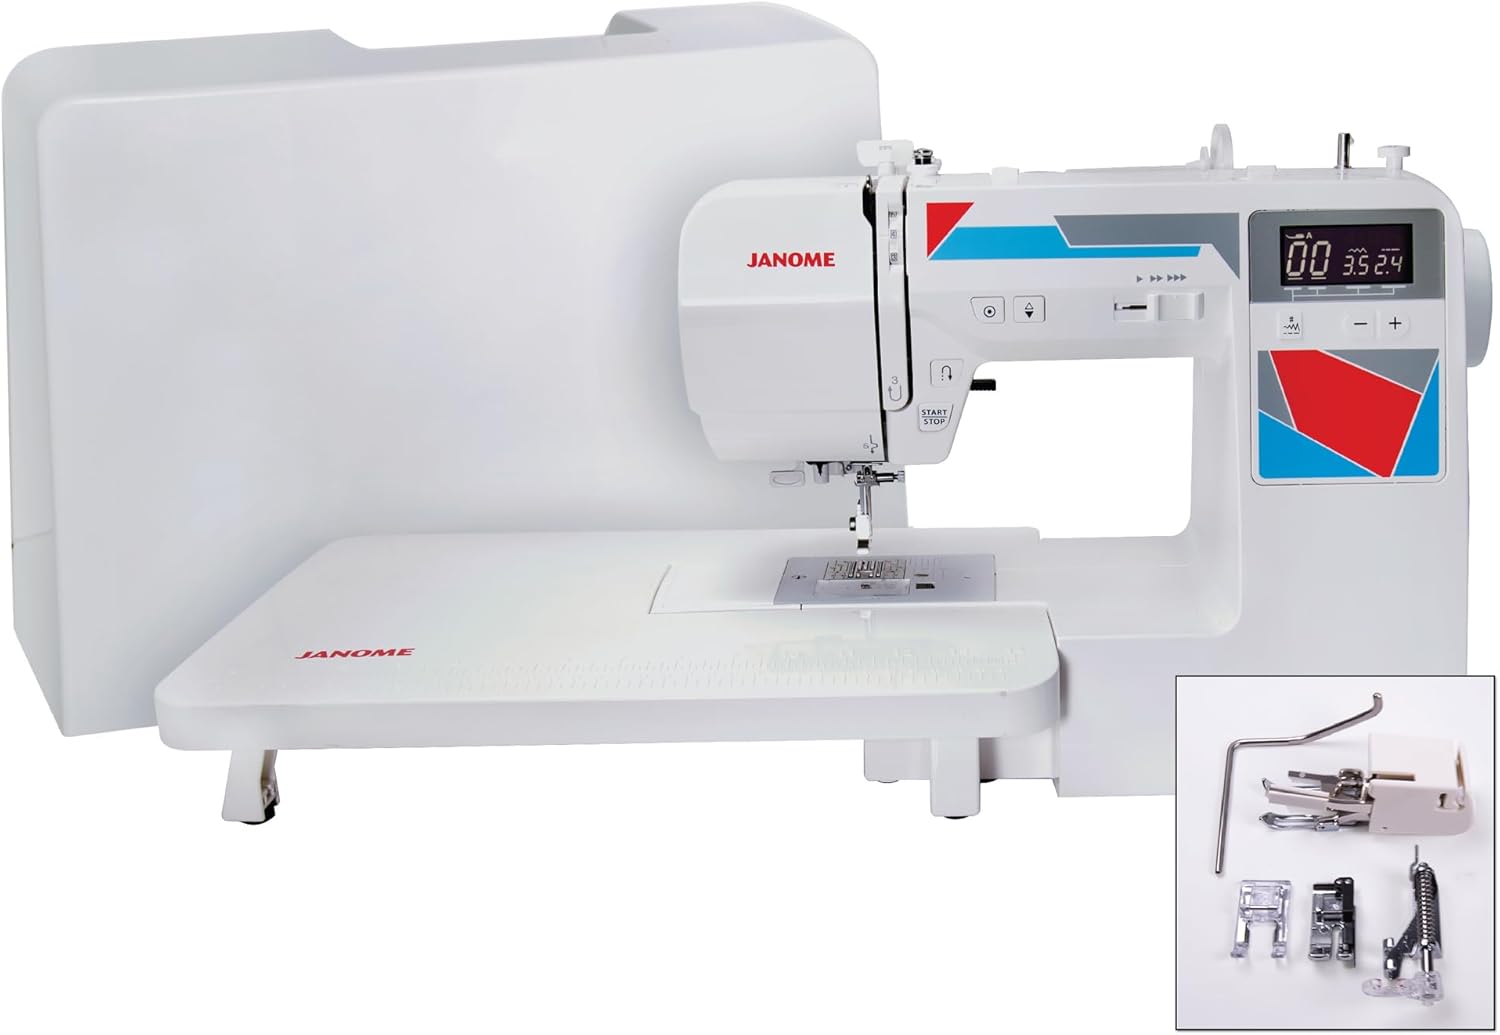
✦ Best Mid-Range Quilting Machine
Janome MOD-100Q — Free-Motion Quilting Ready, Wide Table Extension
A dedicated quilter’s machine with feed dog drop, walking foot compatibility, and a wide extension table. Read our full Janome MOD-100Q quilting review.
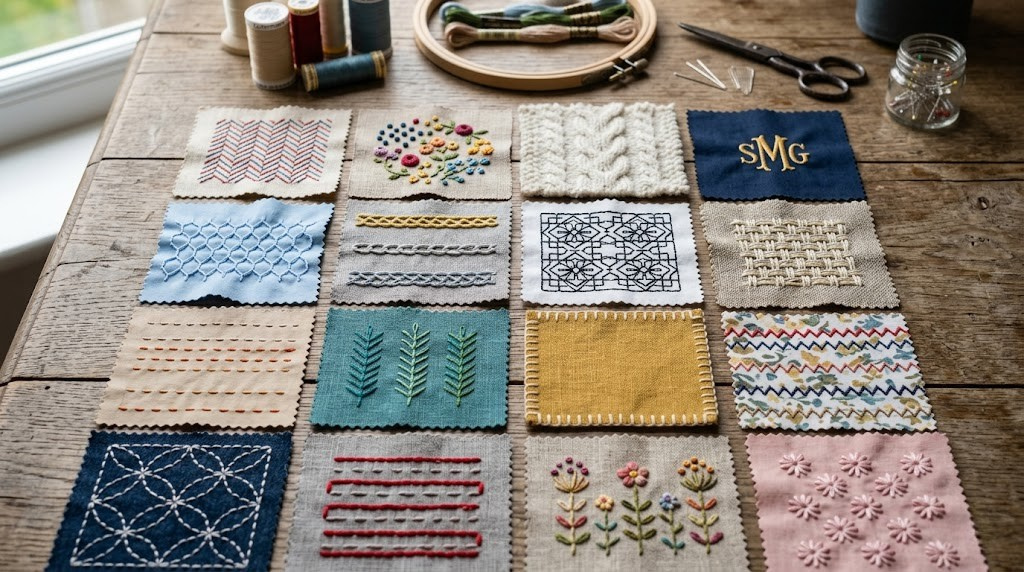
Check Price on Amazon09 — Decorative Stitches: Turning Function Into Art
Every sewing machine — even entry-level models — includes at least a handful of decorative stitches alongside the utility ones. Mid-range machines offer 60–150. High-end and computerized machines can include several hundred. Decorative stitches transform plain fabric into decorated surface without any additional tools or materials beyond thread.
Understanding what these stitches are — and when to actually use them — is something most sewists never figure out. Let’s change that.
Types of Decorative Stitches by Category
Decorative Type 01
Satin Stitch Patterns
Dense zigzag-based stitches forming solid shapes: chevrons, diamonds, triangles, waves. Create a filled, fabric-heavy texture. Excellent for borders, cuffs, and home décor accents.
Decorative Type 02
Smocking Stitches
Geometric patterns that gather and hold fabric in a smocked (pleated, textured) configuration. Used on children’s garments, heirloom sewing, and vintage-inspired dresses. Requires specialized presser foot on some machines.
Decorative Type 03
Feather Stitches
A looping, branch-like stitch that replicates traditional hand feather stitching. Used in crazy quilting, journal covers, visible mending, and folk art sewing.
Decorative Type 04
Cross Stitches
Machine-sewn X-pattern stitches used for decorative borders, heirloom details, and denim embellishment. Far faster than hand cross-stitch but identical in appearance.
Decorative Type 05
Picot Stitches
Small loop-edged stitches used along hem edges for a delicate, vintage-inspired finish. Popular in lingerie, baby garments, and handkerchief edges.
Decorative Type 06
Scallop / Shell Stitches
Create a curved, shell-shaped edge or surface pattern. The shell tuck stitch actually pinches fabric into tiny scallops — beautiful on fine cotton and linen.
Decorative Type 07
Honeycomb (Decorative)
A geometric hexagonal lattice pattern used for surface decoration on bags, cushion covers, and quilt borders. Not to be confused with the utility honeycomb stretch stitch.
Decorative Type 08
Wave / Serpentine Stitches
Gentle S-curves running along the fabric surface, used for decorative borders, joining lace to fabric (entredeux), and heirloom sewing insertions.
How to Get the Most from Decorative Stitches
The biggest mistake sewists make with decorative stitches is using them on the wrong stabilizer setup. Decorative stitches — especially wide satin stitch patterns — pull on the fabric significantly as the dense thread passes through. Without adequate support, the fabric tunnels (bunches under the stitch line) and the pattern distorts.
- Woven fabrics: Use a tear-away stabilizer underneath for wide decorative stitches.
- Knit fabrics: Use a cut-away or water-soluble stabilizer — tear-away pulls the stitch out of shape on stretch.
- Very light fabrics (organza, chiffon): Use water-soluble stabilizer on top AND below.
- Always test decorative stitches on a scrap of your exact fabric + stabilizer combination before sewing on your project.
Thread Choices for Decorative Stitching
Standard sewing thread works for decorative stitches, but for maximum visual impact:
- 40-weight rayon thread produces a high-sheen, silky finish ideal for satin stitch patterns.
- 40-weight polyester embroidery thread is similar to rayon but more colorfast and washfast — preferred for garments that will be laundered.
- 12-weight cotton thread creates a thick, bold stitch line with a matte, artisanal quality — beautiful for visible mending and folk art decoration.
- Variegated thread (multiple colors in a single thread) creates a color-shifting effect as the stitch progresses — very effective for long decorative borders.
See our full breakdown of polyester thread vs. cotton thread for guidance on which fiber performs best in your machine’s tension system. You can also check whether embroidery thread can be used for regular sewing projects.
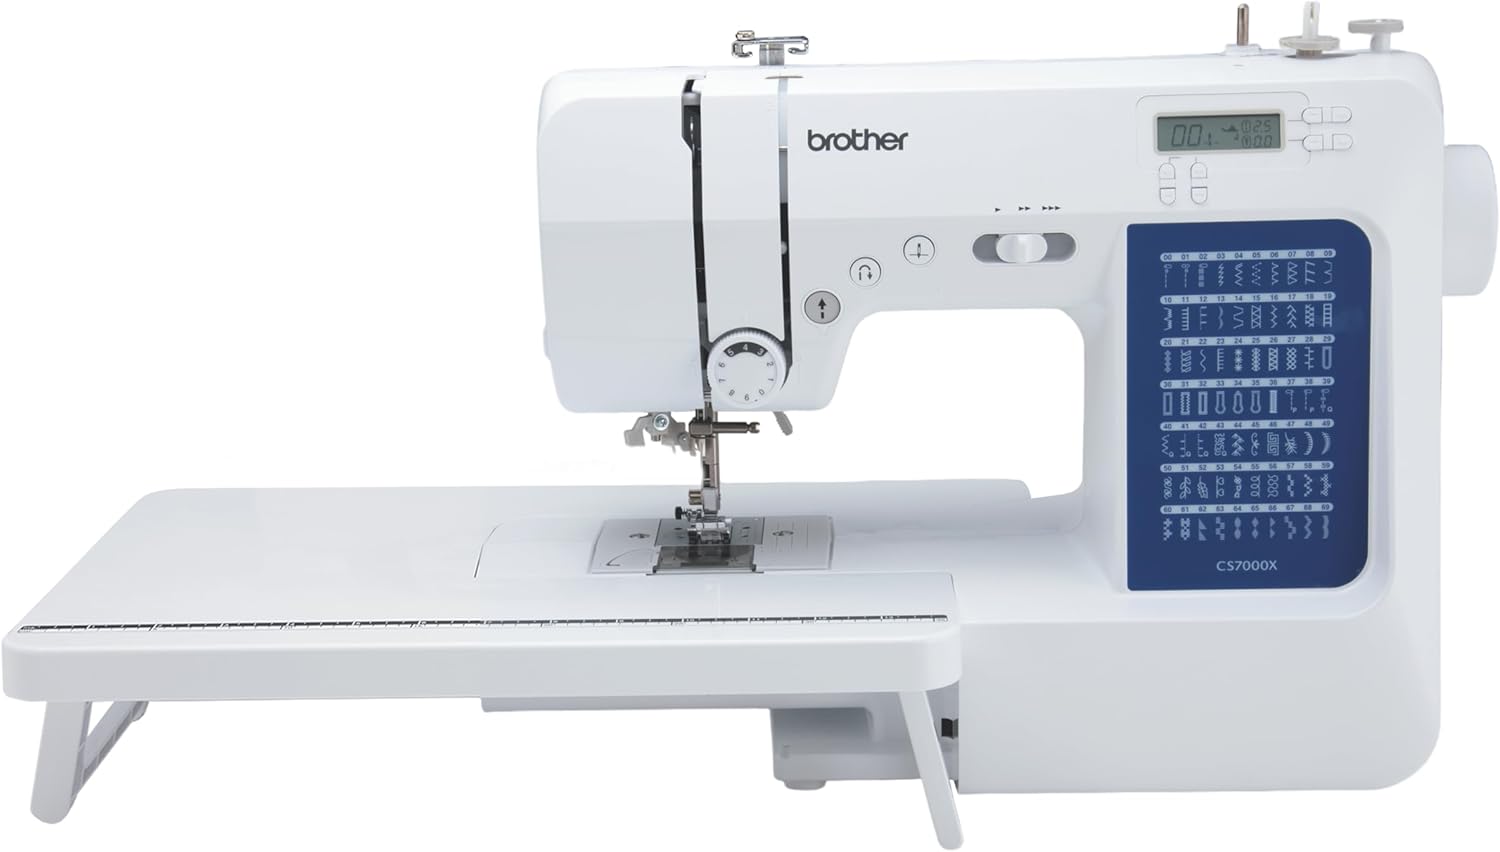
✦ Best for Decorative Stitch Work
Brother CS7000X — 70 Built-In Stitches, Metal Frame, Quilting Table
Wide stitch library with excellent decorative options, metal frame stability, and included quilting table. Full review: Brother CS7000X metal frame analysis.
Check Price on Amazon10 — Machine Embroidery Stitches: From Monograms to Full Designs
Machine embroidery stitches are fundamentally different from all the stitches we’ve covered so far. They’re not sewn freehand — they’re executed by the machine following a pre-programmed digital design file, with the fabric held in a hoop that moves automatically in X and Y axes while the needle stitches. The result is high-resolution, commercially-accurate embroidery produced at home.
If you’re interested in exploring machine embroidery, our comparison guides on Brother PE800 vs SE1900 for embroidery workflow and the SE600 vs SE1900 hoop size analysis are excellent starting points for machine selection.
The Four Core Machine Embroidery Stitch Types
1. Satin Stitch (Column Stitch)
The most fundamental embroidery stitch — a dense series of zigzag stitches placed side by side, completely covering a defined column of fabric with solid thread. Satin stitch creates the smooth, shiny filled areas you see in lettering and simple motifs. It works best for shapes up to about 12mm wide; wider shapes need padding (additional underlay passes) to prevent sagging.
2. Fill Stitch (Tatami / Run Stitch Fill)
For large areas too wide for satin stitch, embroidery designs use fill stitches — rows of running stitches layered at different angles to build up a solid, matte-textured area. The angle changes between layers create a woven appearance and prevent the fill from looking directionally shiny. Fill stitches can cover very large areas efficiently.
3. Running Stitch (Outline Stitch)
The embroidery machine’s straight stitch equivalent — a single line of stitching used to create outlines, fine detail, lettering details, and underlay for other stitch types. In embroidery digitizing, a running stitch outline often appears first to stabilize the fabric before the denser satin and fill stitches are applied.
4. Bean Stitch (Triple Run)
Three passes of a running stitch in a forward-backward-forward sequence, creating a bold, thick outline stitch. Used where a single running stitch outline would look too thin or delicate — particularly in appliqué outlines and bold graphic designs.
Understanding Density in Embroidery
Stitch density (expressed as the distance between parallel stitch passes in millimeters) determines whether your embroidery looks full and rich or sparse and washed-out. Higher density means more thread per area — beautiful but can cause fabric distortion and needle breakage if too extreme. Lower density is lighter but may show the base fabric through the stitches.
| Stitch Type | Typical Density | Visual Result | Best Fabric |
|---|---|---|---|
| Satin stitch | 0.3–0.4mm spacing | Smooth, shiny, fully covered | Stable wovens, fleece with backing |
| Fill / Tatami | 0.4–0.5mm spacing | Matte, woven texture, large area | All stable fabrics |
| Running stitch outline | N/A (single pass) | Fine line, detail | All fabrics |
| Bean / triple run | 3 overlapping runs | Bold outline, graphic quality | All fabrics, especially knits |

✦ Best Dedicated Embroidery Machine
Brother PE800 — 5×7 Hoop, 138 Designs, USB Import Ready
The gold standard for home embroidery. 5×7 inch hoop, bright LCD touchscreen, and a massive built-in design library. Full breakdown: PE800 vs SE600 hoop workflow.
Check Price on Amazon11 — Stitch Settings Deep Dive: Tension, Length, Width, and Speed
Knowing which stitch to select is only half the equation. The other half is setting it up correctly. Even the right stitch type will produce poor results if your tension is off, your length is wrong for your fabric weight, or your machine is running at the wrong speed for your fabric type. This section is your complete settings reference guide.
For a companion reference, our article on sewing machine features: dial and button breakdown explains every dial and button on your machine.
Thread Tension: The Most Misunderstood Setting
Thread tension controls how tightly the thread is pulled through the fabric as each stitch is formed. Most home sewing machines have a single tension dial (often numbered 0–9) that controls the upper thread (needle thread) tension. The bobbin tension is usually preset and not user-adjustable on most home machines.
The goal of proper tension: the lock point (where upper and lower thread meet) should be exactly in the middle of the fabric — not visible on either the top or bottom surface. Here’s how to read your stitch quality to diagnose tension problems:
| What You See | Diagnosis | Fix |
|---|---|---|
| Loops on the bottom of fabric | Upper tension too loose | Increase upper tension (higher number) |
| Loops on the top of fabric | Upper tension too tight (or bobbin too loose) | Decrease upper tension (lower number) |
| Thread nesting on underside | Improper upper threading | Rethread with presser foot RAISED; see threading guide |
| Puckered fabric along seam | Tension too tight for fabric weight, or stitch too short | Reduce tension; increase stitch length slightly |
| Seam spreads open | Tension too loose | Increase tension; decrease stitch length |
Stitch Length Reference Chart (All Fabric Categories)
| Fabric Category | Example Fabrics | Straight Stitch Length | Zigzag Length | Needle Size |
|---|---|---|---|---|
| Sheer / Delicate | Chiffon, organza, voile, silk | 1.5–2.0mm | 1.0–2.0mm / Width 1–2mm | 60/8 or 65/9 |
| Lightweight wovens | Lawn, batiste, fine cotton, crepe | 2.0–2.5mm | 2.0mm / Width 2–3mm | 70/10 or 75/11 |
| Medium wovens | Quilting cotton, chambray, linen, poplin | 2.2–2.8mm | 2.5mm / Width 3mm | 80/12 |
| Medium-heavy wovens | Denim (8oz), twill, canvas, corduroy | 2.8–3.5mm | 3.0mm / Width 3–4mm | 90/14 or 100/16 |
| Heavy wovens | Denim (12+oz), upholstery, leather | 3.5–4.0mm | 3.5mm / Width 4mm | 100/16 or 110/18 |
| Lightweight knits | Jersey, rib, bamboo knit, single knit | Avoid (use stretch stitch) | 2.5mm / Width 1.5–2.5mm | 75/11 stretch needle |
| Heavy knits | Sweatshirt fleece, ponte, double knit | Avoid | 3.0mm / Width 2–3mm | 90/14 stretch needle |
| High-stretch | Lycra, spandex, swimwear, activewear | Avoid | 2.5mm / Width 2.5mm + 3-step | 75/11 ballpoint |
Machine Speed and Stitch Quality
Most home sewists either run their machine at maximum speed all the time, or use a timid, stop-start crawl that produces uneven stitching. Neither is ideal. Stitch quality is most consistent at a medium, steady machine speed — fast enough to keep the feed dogs engaged and the stitch formation regular, but not so fast you lose control of direction.
Speed is particularly important when:
- Sewing curves — slow down by 30–50% for control
- Sewing thick seam intersections — slow nearly to a stop for the crossing point, then resume
- Sewing very delicate fabrics — a slower speed generates less heat from needle friction
- Sewing free-motion quilting — your hand movement speed must match machine speed for consistent stitch length
If your machine is jamming consistently, speed is rarely the cause — but jamming causes and solutions are worth investigating. Similarly, if you’re experiencing ongoing thread or needle issues, our full resource on sewing machine needle problems will cover the root cause.
12 — Stitch Selection by Fabric Type: The Complete Reference
The best stitch for any given project is always determined by your fabric first, your project function second, and aesthetic preferences third. Choosing stitches in any other order leads to frustration. Here’s your comprehensive reference matrix for matching stitch type to fabric category.
Woven Fabrics (Non-Stretch)
Woven fabrics (cotton, linen, silk, wool, denim, canvas) are dimensionally stable — they don’t stretch significantly in the lengthwise or crosswise direction (though they can stretch on the bias). For woven fabrics, the straight stitch is almost always the primary seaming stitch. Seam finishing depends on the fabric’s tendency to fray and the desired finish level.
| Fabric | Seam Stitch | Seam Finish | Hem Stitch | Special Notes |
|---|---|---|---|---|
| Quilting cotton | Straight 2.2–2.5mm | Zigzag or serged | Straight 2.5mm topstitch | Pre-wash to prevent shrinkage; see pre-wash guide |
| Linen / linen blends | Straight 2.5–3.0mm | French seam or serged | Straight 3.0mm topstitch | High fraying — always finish edges |
| Denim (light–medium) | Straight 3.0mm or triple | Serged or flat-felled | Topstitch 3.5mm | Use 90/14 or 100/16 needle |
| Denim (heavy 12+oz) | Straight 3.5–4.0mm | Flat-felled seam | Double-needle topstitch 4mm | Use 110/18 jeans needle; slow at intersections |
| Silk / charmeuse | Straight 1.8–2.0mm | French seam | Rolled hem or machine narrow hem | Use silk needle 60/8; tissue paper under foot |
| Chiffon / georgette | Straight 1.5–2.0mm | French seam or rolled hem serger | Rolled hem serger or narrow machine hem | Tissue paper under and over while sewing |
| Canvas / duck cloth | Straight 3.5–4.0mm | Zigzag wide or serged | Topstitch double row 4mm | Walking foot recommended for thick layers |
| Leather / faux leather | Straight 3.0–4.0mm | None (edges don’t fray — burnish or glue) | Topstitch 4.0mm or hand glue | Leather needle only; no pins — clip only |
Knit Fabrics (Stretch)
Knit fabrics stretch in at least one direction (typically widthwise). The single most important rule: every seam in a knit garment must stretch. This rules out straight stitch for the primary seam on most knit projects.
| Knit Type | % Stretch | Seam Stitch | Hem Stitch | Best Foot |
|---|---|---|---|---|
| Interlock / ponte | 25–50% | Narrow zigzag W1.5/L2.5 or lightning stitch | Coverstitch or twin-needle | Walking foot |
| Single jersey (t-shirt) | 50–75% | Narrow zigzag or serged 4-thread | Coverstitch 2-needle or stretch blind hem | Walking foot or serger |
| Rib knit | 75–100% | Wide zigzag W2.5/L2.5 or serged | Coverstitch | Walking foot |
| Swimwear (Lycra blend) | 100%+ | 3-step zigzag W5/L1.5 or serged 4-thread | Coverstitch or 3-step zigzag | Teflon or roller foot |
| Sweatshirt fleece | 30–50% | Narrow zigzag or lightning stitch | Topstitch straight (folded hem) or coverstitch | Walking foot |
| Velvet / velour (knit) | 25–50% | Narrow zigzag | Hand slip stitch or careful topstitch | Teflon foot; sew with pile direction |
Specialty Fabrics
| Fabric | Primary Stitch | Special Technique |
|---|---|---|
| Velvet (woven) | Straight 2.0–2.5mm | Sew in direction of pile; use tissue paper; walking foot |
| Faux fur | Straight 3.0mm | Sew wrong sides together; brush seams out after; use long-pile needle |
| Vinyl / PVC | Straight 3.5mm | Teflon foot; no pins (permanent holes); use clips |
| Neoprene | Zigzag W3/L2.5 or straight | Butt seams flat and zigzag over them; no seam allowance needed |
| Organza | Straight 1.5mm | French seam; tissue paper; extra-fine needle |
| Tulle / netting | Straight or zigzag 2.0mm | Sew through multiple layers; no seam finishing needed |
13 — Stitch Troubleshooting: When Your Stitches Go Wrong
Even with the right stitch selected and proper settings dialed in, things go wrong. Stitches skip. Thread breaks. Seams pucker. The fabric bunches. These problems are rarely caused by the machine itself — they’re almost always a threading, needle, thread, or settings issue that you can diagnose and fix in minutes.
Before we dive in: for a comprehensive troubleshooting reference that goes far beyond stitching, see our complete sewing machine troubleshooting guide. Here we’ll focus specifically on stitch quality problems.
The First Rule of Stitch Troubleshooting
Before you adjust anything — tension, length, width — do these three things first:
- Change the needle. A new needle costs pennies and solves more sewing problems than any other single action. Needles should be changed every 8–10 hours of sewing or when you start a new project. A bent or dull needle causes skipped stitches, fabric snags, and thread breakage. Read our complete guide to sewing machine needle sizes to make sure you’re using the right one.
- Rethread completely. Remove all thread and start from scratch. Make sure the presser foot is raised while threading the upper thread. Thread the bobbin correctly and ensure it’s seated properly in the case.
- Clean the bobbin area. Lint and thread fragments in the bobbin case are the root cause of a remarkable number of tension and jamming problems. Our guide on sewing machine oil and cleaning covers how to properly maintain your machine.
Stitch-Specific Problem Solutions
| Problem | Stitch Affected | Most Common Cause | Solution |
|---|---|---|---|
| Decorative stitch tunneling | All decorative / satin stitches | No stabilizer used | Add tear-away stabilizer under fabric |
| Zigzag puckering in center | Zigzag, decorative | Tension too tight | Reduce tension by 0.5–1 step; use embroidery foot |
| Buttonhole columns uneven | Buttonhole stitch | Feed dog not moving fabric evenly | Ensure buttonhole foot is correctly attached; clean feed dogs |
| Blind hem visible from right side | Blind hem stitch | Swing stitch catching too much fabric | Adjust needle position left; reduce width setting |
| Stretch stitch breaking on wear | Lightning / triple straight | Wrong needle type for knit | Switch to ballpoint or stretch needle |
| Embroidery design distorting | Machine embroidery fills | Incorrect or insufficient stabilizer | Add cut-away backing + topping for dense designs on knits |
For problems specific to Brother machines — including the E6 error that signals a thread jam — our dedicated resource on Brother E6 error thread jam clearance walks you through every step. And if your machine problem is more general, start with our sewing machine setup checklist to make sure you haven’t missed a fundamental step.

✦ Solve 80% of Stitch Problems Instantly
Schmetz Needle Variety Pack — Universal, Stretch, Quilting, Jeans
The single most cost-effective fix for most sewing machine stitch problems. Keep a variety pack on hand — change your needle before you change any settings.
Check Price on AmazonBonus — Coverstitch, Chainstitch, and Serger Stitches
Beyond the standard home sewing machine, there are two other machine types that produce specific stitch families worth knowing: the coverstitch machine and the chainstitch (found on sergers with that capability). These are technically separate machines but so common in sewing rooms that a stitch guide would be incomplete without covering them.
The Coverstitch
The coverstitch is the stitch that finishes t-shirt and activewear hems on ready-to-wear clothing. It looks like two (or three) parallel rows of topstitching on the right side, with a wide looper stitch on the wrong side that covers the raw edge entirely. It requires a dedicated coverstitch machine (not a serger, not a standard machine — though some combo machines do both).
A coverstitch is the benchmark for knit hem finishing. If you sew t-shirts, leggings, or activewear frequently and want that professional factory look, a coverstitch machine is the single most impactful equipment upgrade after a basic sewing machine.
The Chainstitch
A chainstitch uses only the needle thread (no bobbin), forming a loop-through-loop chain on the underside of the fabric. It looks like a standard straight stitch from the top, but on the underside creates a distinctive linked chain. The advantage: chainstitching is fast and allows fabric to stretch slightly along the stitch length. The disadvantage: pull one end and the whole seam unravels like a zipper (which is actually how some industrial seams are designed — quick disassembly for pattern grading).
Most home sewists will never need a dedicated chainstitch, but some combination serger-chainstitch machines do offer this option for industrial-look topstitching on denim.
Serger Stitch Combinations
A serger can produce multiple stitch configurations depending on how many threads are engaged:
| Configuration | Thread Count | Best Use |
|---|---|---|
| 2-thread overlock | 2 | Lightweight seam finishing, rolled hems, flatlock |
| 3-thread overlock | 3 | Standard knit seaming, seam finishing on wovens |
| 4-thread overlock (safety stitch) | 4 | Strongest knit seam — seams AND finishes in one pass |
| 5-thread overlock with chainstitch | 5 | Maximum strength — used in commercial garment production |
| Rolled hem | 2–3 | Fine, narrow rolled hem on delicate fabrics, scarves, napkins |
| Flatlock | 2–3 | Flat decorative seam — visible looper thread used as design element |
Frequently Asked Questions — Sewing Machine Stitch Types
-
The straight stitch is the single most important stitch to master on any sewing machine. It is used in virtually every sewing project for seaming, topstitching, basting, and structural reinforcement. Every other stitch type is built upon or branches away from the principles established by the straight stitch. If you can sew a consistent, well-tensioned straight stitch, you can learn any other stitch on your machine.
-
Never use a standard straight stitch as the sole stitch on knit or stretch fabric seams — it will pop and break when the garment is worn. For lightweight knits, a narrow zigzag (width 1.5mm, length 2.5mm) or the lightning/triple straight stitch offers sufficient stretch. For medium to high-stretch knits, use a dedicated stretch stitch or a three-step zigzag. For maximum-stretch fabrics like Lycra and swimwear, the three-step zigzag with a wide setting (width 5mm) or a serger with a 4-thread overlock provides the best results. A stretch needle (ballpoint) is also essential — it slides between the knit loops rather than piercing and breaking them.
-
For quilting cotton and standard cotton wovens, a stitch length of 2.2–2.5mm is the standard recommendation for construction seams. This creates a seam strong enough to withstand wear and laundering without perforating the fabric too densely. For topstitching on cotton, increase to 3.0–3.5mm for a more traditional, visible look. For basting or gathering cotton, use the maximum stitch length (4.0–6.0mm) and reduce tension slightly for easy removal.
-
A zigzag stitch is a basic two-point lateral stitch that alternates left and right in a V-pattern. It has some inherent stretch but is a general-purpose stitch used for seam finishing, light knit work, and decorative purposes. A stretch stitch is a specialized stitch family designed specifically for stretch fabrics — examples include the triple straight stitch (lightning stitch), the three-step zigzag, and the honeycomb stitch. Stretch stitches build in far more stretch capacity per inch of seam than a standard zigzag, and they distribute the stress of stretching across more thread connections, making them significantly stronger for knit and activewear applications.
-
Skipped stitches are almost always caused by one of four things: (1) The needle is bent, blunt, or the wrong type for your fabric — change the needle first; (2) The needle is inserted incorrectly — it should be pushed all the way up into the clamp with the flat side facing the back; (3) The upper thread is not properly seated in all thread guides — rethread from scratch with the presser foot raised; (4) The needle and bobbin thread are not synchronized — this can indicate a timing issue requiring a technician if all other causes are eliminated. For knit fabrics specifically, skipped stitches typically indicate you’re using a universal needle instead of a stretch/ballpoint needle.
-
For denim construction seams, use a straight stitch at 3.0–4.0mm length depending on fabric weight (heavier denim = longer stitch). Use a 90/14 or 100/16 jeans needle (which has a sharp, reinforced point specifically designed to pierce tightly woven denim). For topstitching, increase stitch length to 3.5–4.0mm and consider topstitching thread (heavier weight) for the authentic jeans look. At thick seam intersections (like jeans inseams), slow to nearly a stop and use the hand wheel to ease the needle through — or use a hump jumper to prevent skipping. For a detailed machine comparison on denim performance, see our piece on Singer vs Brother heavy-duty denim torque.
-
An invisible (blind) hem on a sewing machine requires three things: the blind hem stitch setting on your machine, a blind hem presser foot, and careful fabric preparation. Fold the hem allowance to the wrong side and press. Then fold the hem back on itself so the fold of the garment fabric is exposed slightly. Place the fabric under the blind hem foot so the guide runs along the folded edge, and sew with the blind hem stitch — the swing stitch will catch just a few threads from the fold. From the right side, only tiny thread dots are visible. Practice on scrap fabric before the actual garment, and adjust the needle position to the left to minimize visibility of the catch stitch.
-
Yes, genuine and faux leather can be sewn on a regular home sewing machine with the right setup. Use a leather needle (which has a wedge-shaped cutting point rather than a round point), a Teflon presser foot (leather sticks to standard metal feet), and a stitch length of 3.5–4.0mm (short stitches perforate the leather and weaken it). Never use pins — they leave permanent holes; use sewing clips or binder clips instead. Because leather seams don’t ravel, no seam finishing is needed — simply trim and topstitch to hold seam allowances flat. For very thick leather or multiple layers, a walking foot helps prevent slippage.
-
A basting stitch is a long, temporary straight stitch (4.0–6.0mm length) sewn with reduced tension so it can be easily removed after permanent stitching is in place. It’s used to temporarily hold fabric pieces together before final stitching — particularly useful for fitting garments before committing to a permanent seam, for holding multiple layers in alignment while you sew over them, and for gathering (running a long basting stitch and then pulling the bobbin thread to gather the fabric into ruffles). Always sew basting in a contrasting thread color so it’s easy to identify and remove. Learn more in our dedicated guide on what is a basting stitch.
-
For a beginner, you genuinely need fewer than a dozen stitches to handle 95% of sewing projects: a straight stitch (with adjustable length), a zigzag stitch (with adjustable width and length), a stretch stitch (or three-step zigzag), a buttonhole stitch, a blind hem stitch, and a few decorative options. A machine with 20–30 stitches is more than sufficient for learning and intermediate work. The machine’s build quality, motor, and feed dog performance matter far more than stitch count. Our sewing machine buying guide explains exactly what to prioritize for different experience levels.
-
Tunneling (the fabric pulling up under the stitch line) is the most common decorative stitch problem. It occurs because dense stitches create significant thread tension that pulls the fabric lengthwise. The fix is stabilization: place a piece of tear-away stabilizer (for wovens) or cut-away stabilizer (for knits and stretchy fabrics) underneath the fabric area you’re stitching. For very lightweight fabrics, add a layer of water-soluble stabilizer on top as well. Additionally, reduce your upper tension by 0.5–1 step below normal, and use an open-toe or embroidery presser foot that allows you to see the stitch placement clearly. These three adjustments — stabilizer, tension, and presser foot — solve tunneling in the vast majority of cases.
-
A coverstitch is the stitch used on the hems of almost every commercially made t-shirt, legging, and knit garment — it produces two or three parallel rows of topstitching on the right side, and a wide looping stitch that covers the raw hem edge on the wrong side. This stitch has excellent stretch retention and a very professional appearance. To produce a true coverstitch, you need a dedicated coverstitch machine (not a standard sewing machine and not a serger, though some combination machines can do both). A twin needle on a standard machine can simulate the look on the right side but does not produce the same stretch as a coverstitch, and the wrong side looks completely different. If you sew knit garments regularly, a coverstitch machine is one of the most valuable equipment investments you can make.

✦ Our Top Versatile Mid-Range Pick
Janome JW8100 — 100 Stitches, Automatic Tension, Perfect All-Rounder
Covers every stitch category in this guide with outstanding consistency. Read the full Janome JW8100 review before you buy.
Check Price on AmazonConclusion: Stitches Are the Language of Sewing
Every stitch type on your sewing machine exists because someone, at some point, needed a better way to solve a specific problem. The zigzag stitch solved the problem of knit fabric seams breaking. The blind hem stitch solved the problem of visible hemming stitches on garments. The coverstitch solved the problem of stretchy hems that look handmade. The machine embroidery satin stitch solved the problem of time-consuming hand embroidery.
When you understand what each stitch was designed to solve, choosing the right one becomes intuitive rather than intimidating. You stop guessing at your machine’s stitch menu and start selecting with purpose. That’s the shift from being a person who uses a sewing machine to being a sewist who commands one.
Start with the straight stitch and the zigzag. Build from there. Test every stitch in this guide on scrap fabric before you need it in a real project. Keep a swatch journal. Write down what settings worked for which fabric. Over time, that reference becomes priceless — and it’s entirely personal to how your machine behaves.
If you’re just starting out, our guide on how to use a sewing machine covers all the fundamentals. If you’re ready to find the machine that matches your ambitions, start with our comprehensive sewing machine buying guide. And when things go sideways — because they always do at some point — our sewing machine troubleshooting guide is your first stop.
Now go make something. The right stitch is waiting for you.
Find Your Perfect Machine →