How to Thread a Sewing Machine Step by Step — The Only Guide You’ll Ever Need
Why Correct Threading Is the Foundation of Every Good Stitch
Of all the sewing machine skills a beginner must master, threading is the one that trips people up the most — yet it’s also the one that unlocks everything else. Thread it wrong and nothing sews correctly. Thread it right and your machine practically hums.
Every single sewing problem — from skipped stitches to broken thread to the dreaded bird’s nest of loops under your fabric — can trace its roots back to threading. According to professional sewing educators, improper threading accounts for over 70% of sewing machine complaints brought into repair shops. The machine isn’t broken; it just wasn’t threaded properly.
In this comprehensive guide, we’ll walk you through every single step of threading any sewing machine — from winding the bobbin to pulling up that first satisfying loop of bobbin thread. We’ll cover every major brand including Brother, Singer, Janome, and Bernina, explain the “why” behind each step so you actually understand what’s happening inside your machine, and give you a complete troubleshooting section for when things don’t go as planned.
Whether you’ve just unboxed your first machine and want to start on the right foot, or you’ve been sewing for years and somehow never got a clear explanation of the threading path, this guide is for you. If you’re brand new to sewing entirely, you may also want to read our guide on how to use a sewing machine as a companion to this article.
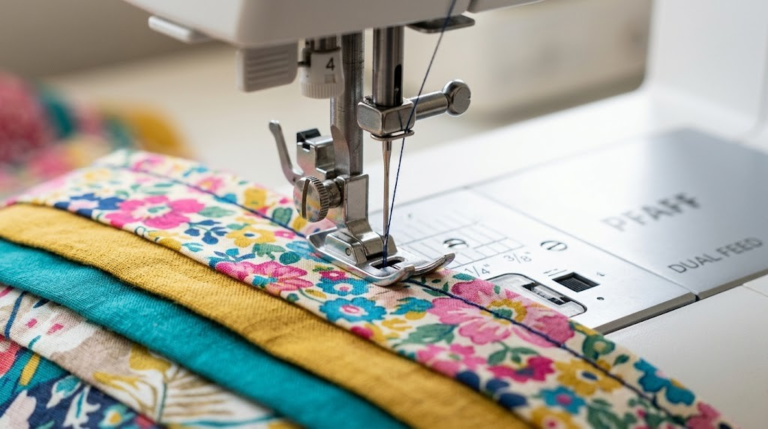
The threading process can feel intimidating because sewing machines have so many little hooks, guides, and tension discs that all need to work in sequence. But here’s the reassuring truth: the path the thread takes is almost always printed directly on your machine in the form of numbers, arrows, or diagrams. Once you understand what each part does and why the thread passes through it, the sequence becomes obvious and memorable.
Let’s also dispel one myth right now: this is not something you’ll forget once you learn it. After threading your machine three or four times, the motion becomes muscle memory. Many experienced sewists thread their machines without even looking at the guides anymore. You’ll get there too.
Before You Start: Everything You Need to Know
Good preparation makes threading smoother and prevents the most common beginner mistakes. Before you pull a single thread through a single guide, take sixty seconds to get organized. This section covers the supplies you need, the parts of the machine you’ll be working with, and the one preparation step most beginners skip entirely.
Tools and Supplies You’ll Need
Thread Spool
Any standard sewing thread — polyester all-purpose or cotton. Make sure it’s not old and brittle.
Bobbin
The small cylindrical spool that goes in the bottom of the machine. Must match your machine’s bobbin size.
Good Lighting
Essential for threading the needle. A dedicated sewing lamp makes a huge difference.
Sharp Scissors
To cut a clean diagonal point on the thread end for easy needle threading.
Machine Manual
Your specific model’s threading diagram. Download it free from the manufacturer’s website if lost.
Needle Threader
Optional but helpful. Many modern machines have a built-in automatic needle threader.
Key Machine Parts You’ll Be Working With
Before threading, you need to know what you’re looking at. Here’s a quick reference for every part you’ll touch during the threading process:
| Part Name | What It Does | Location |
|---|---|---|
| Spool Pin | Holds the thread spool upright (or horizontal) | Top of machine, left or center |
| Thread Guides | Numbered hooks/clips that route thread along the correct path | Top and front of machine |
| Tension Discs | Two metal discs that grip the thread to control tension | Upper threading path, front of machine |
| Take-Up Lever | Hook arm that pulls thread upward; controls stitch formation | Front of machine, moves up/down |
| Thread Guide at Needle | Final small clip just above the needle clamp | Above needle bar |
| Needle Eye | The hole in the needle through which thread passes | Bottom of needle |
| Bobbin Winder | Pin and spindle used to wind thread onto the bobbin | Top of machine, right side |
| Bobbin Case/Area | Holds the bobbin; feeds thread from below the fabric | Below needle plate (front-load or top-load) |
| Presser Foot Lever | Raises/lowers presser foot; MUST be raised when threading | Back of machine, right side |
| Handwheel | Manual turning wheel to move needle up/down | Right side of machine |
| Needle Plate | Metal plate with hole through which bobbin thread comes up | Below needle/presser foot |
Now, let’s also talk about needle condition. Threading a new machine or after a thread breakage is a good moment to check whether your needle needs replacing. A bent, blunt, or incorrectly installed needle will cause threading and stitching problems. Learn more about whether sewing machine needles are universal and our complete guide to sewing machine needle sizes to make sure you have the right needle installed.
Also ensure the needle is fully inserted and tightened. Push it all the way up into the clamp and tighten the needle screw firmly. A loose needle causes erratic stitching and is a common source of needle problems.
Step 1 – How to Wind the Bobbin
The bobbin supplies thread from below the fabric to form the lower half of each stitch. Before you can thread the machine, you need a properly wound bobbin. A poorly wound bobbin — uneven, too full, or wound too loosely — causes stitching problems that are often blamed on the machine.
Place an empty bobbin on the bobbin winder spindle (located on the top right of most machines). Pull thread from the spool and pass it through the bobbin winding thread guide — usually a small post or slot near the winder. Then pass the thread through the small hole in the side of the bobbin from inside out, and hold the thread tail.
Push the bobbin winder toward the right (or click it into position) to engage the winding clutch. This disengages the needle so it doesn’t move while winding. Press the foot pedal or tap the speed control button to begin winding. Let the machine wind the bobbin, keeping tension on the thread loosely for the first few wraps, then let go.
Stop winding when the bobbin is about 80–90% full. Overfilling a bobbin causes it to rub against the bobbin case and jam. Most machines have an automatic stop mechanism that halts winding when the bobbin is full. Cut the thread and push the bobbin winder back to its original position to re-engage the needle mechanism before you do anything else.
Using a Pre-Wound Bobbin
Many sewists use pre-wound bobbins — bobbins already filled with thread that you buy ready to use. These are especially popular for quilters who go through a lot of bobbin thread. Pre-wound bobbins are generally very evenly wound and can produce consistent results. Just make sure the bobbin size matches your machine (Class 15, Class 66, L-style, M-style, etc.).
For more on selecting the right thread for your machine and project, see our detailed comparison of polyester thread vs cotton thread and our roundup of the best cotton threads for sewing machines.

Gutermann Sew-All Thread Set – 26 Spools
The go-to thread for reliable winding and stitching. Smooth, even, strong — perfectly suited for machine sewing on any fabric.
Check Price on AmazonStep 2 – Inserting the Bobbin Correctly
Bobbin insertion is where many sewists go wrong. Getting the bobbin in backward, or not properly threading the bobbin case, is one of the most common causes of stitching problems. There are two main types of bobbin systems — top-loading and front-loading — and each has a different insertion method.
Top-Loading (Drop-In) Bobbin — Most Common Today
Most modern machines, including the majority of Brother, Janome, and Singer models, use a top-loading bobbin system. You drop the bobbin directly into a compartment under the needle plate, visible through a clear plastic cover or by removing a cover plate.
- Raise the needle to its highest position by turning the handwheel toward you.
- Open the bobbin cover (usually slides or clips off to the left).
- Hold the bobbin so the thread unwinds counterclockwise (most machines). Some machines have a diagram printed right there — follow it.
- Drop the bobbin into the bobbin holder.
- Pull the thread tail into the slot in the bobbin area, then under the hook/guide in the needle plate — your machine will have a clear path marked.
- Pull out about 6 inches of thread and leave it hanging to the left or back.
- Replace the bobbin cover, making sure the thread tail passes through the notch in the cover.
Front-Loading Bobbin — Older and Professional Machines
Front-loading systems use a separate bobbin case that you insert the bobbin into before placing it in the machine. This system is common on older Singer machines, Bernina models, and many professional Juki machines.
- Take the bobbin case out of the machine by opening the front access door and grasping the latch.
- Insert the bobbin into the case so the thread unwinds in the direction indicated (usually counterclockwise).
- Pull the thread into the slot in the bobbin case, then under the tension spring, leaving a 6-inch tail.
- Hold the bobbin case latch and place it back into the machine. You’ll hear/feel it click into place.
If your machine is jamming frequently after bobbin insertion, our detailed guide on why sewing machines jam walks through all the possible causes and fixes. Also check our article on fixing thread nesting under fabric — it’s almost always a bobbin threading issue.
Step 3 – Raise the Presser Foot and Set the Needle Position
This step cannot be overstated. Before you touch a single thread guide, reach to the back of your machine and lift the presser foot lever upward. On most machines it’s a small lever on the right side of the presser bar. On some computerized machines it may be a button.
Why does this matter so much? Inside the machine, directly behind the tension dial on the front of the machine, are two metal tension discs. These discs work like a sandwich — they press against each other to grip the thread and create resistance. When the presser foot is down, these discs are pressed tightly together. When the presser foot is up, the discs open slightly, creating a gap that allows thread to slide between them and seat properly.
If you thread the machine with the foot down, the thread slides around the outside of the closed discs without ever entering them. The machine looks threaded, but the thread has no tension control — resulting in loose, loopy stitches or immediate thread breakage when you start to sew.
Step 4 – Place the Thread Spool Correctly
Sewing machine spool pins come in two orientations: vertical (pointing up) and horizontal (pointing to the side). Knowing which type you have is important because it determines how the thread unwinds and which direction the spool should face.
Vertical spool pin: Place the spool on the pin so that the thread unwinds counterclockwise as you look down at it from above. Most machines print a small arrow near the spool pin showing the correct direction. Always use the spool cap — the small disc that fits over the top of the spool — to keep it from flying off at speed and to prevent the thread from catching on the pin notch.
Horizontal spool pin: The spool lies on its side. Thread unwinds from the end of the spool. These machines often come with a small felt pad or disc that goes between the machine surface and the spool to reduce vibration. Position the spool so the thread comes off the correct side (usually indicated in your manual).
The thread quality and type you choose affects how smoothly it flows from the spool. Old, brittle thread breaks easily. For best results, use thread that matches the fabric weight. Our guide on polyester vs cotton thread will help you choose the right type.
Step 5 – Threading the Upper Path: Following the Thread Guides
This is the heart of the threading process. The upper threading path is the route thread takes from the spool all the way down to the needle. Every machine has numbered guides printed directly on it — follow them in order and you can’t go wrong. The guides exist to route the thread correctly through the tension mechanism and ensure even, controlled stitch formation.
Pull a generous length of thread from the spool — about 18–20 inches. This gives you enough thread to work with without running out mid-path. Now follow these sub-steps:
- First guide (top): Pass the thread through the first guide at the very top of the machine. This is usually a hook or clip near the spool pin itself that keeps the thread from tangling as it unwinds.
- Down the front channel: Pull the thread down toward the front of the machine, into the channel or groove that runs vertically. This channel leads into the tension mechanism.
- Around the tension discs: Thread goes down, around the bottom of the tension mechanism (some machines have a U-shaped loop here), and then back up. Your machine’s diagram will show this clearly. Don’t skip this loop — it’s what puts thread between the tension discs.
As you follow the guides, you should feel slight resistance as the thread seats in each one. If thread slides through completely freely with zero resistance, it may not be in a guide. Each guide has a small hook or slot that the thread must pass through or behind.
Many machines have numbers printed right next to each guide: 1, 2, 3, 4… Simply follow the numbers and you’ll thread it correctly. If your machine has arrows instead of numbers, follow the arrows. Some machines (particularly older Bernina models) have the threading path described in the manual only, so keep yours handy.
For a deeper look at how your machine’s various dials and buttons relate to thread path and tension, see our breakdown of sewing machine features and dials.
Step 6 – Threading the Take-Up Lever: The Most Skipped Step
The take-up lever is the metal hook or arm at the front of the machine that moves up and down as you sew. When the machine is at rest (needle at its highest position), the take-up lever should also be at its highest position — this is why we always thread with the needle up.
The take-up lever performs two essential functions: it pulls thread off the spool to feed into each stitch, and it pulls the thread tight after the needle forms the stitch loop. Without the take-up lever properly threaded, the machine has no mechanism to feed thread — so it either uses up all the slack in the first stitch and then breaks, or produces completely loose, loopy stitches.
How to Thread the Take-Up Lever
After threading through the tension discs (following the U-shaped path up from the bottom), bring the thread up toward the top of the machine face where you’ll see the take-up lever — a hooked metal arm sticking out of a narrow slot. Thread the thread through the hook of the take-up lever, passing the thread from right to left (on most machines). You’ll feel it click or catch in the hook.
Then bring the thread back down toward the needle, passing through any remaining guides between the take-up lever and the needle. There’s typically one small clip or guide just above the needle clamp that the thread must pass through.
Threading problems are among the most common reasons people think their machine is broken. Before assuming a mechanical issue, always re-thread completely. Our sewing machine troubleshooting guide walks through every common issue and its cause.
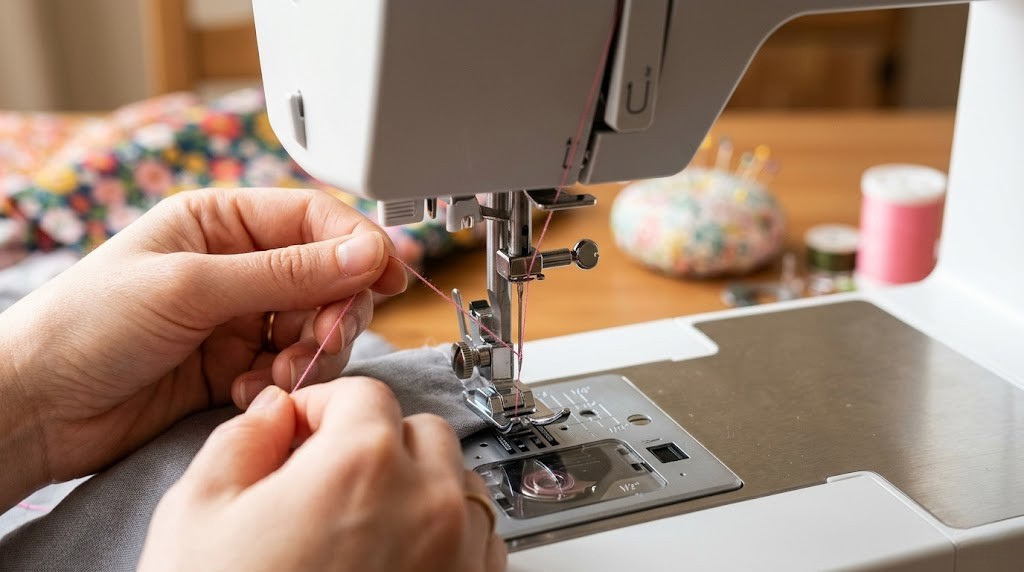
Step 7 – Threading the Needle: Manual and Automatic Methods
Threading the needle is the step most people dread — particularly as eyesight changes or thread is very fine. Fortunately, most modern machines include an automatic needle threader, and there are good manual techniques that make it manageable even without one. Let’s cover both.
Manual Needle Threading
For best results threading manually:
- Use sharp scissors to cut the thread end at a 45-degree angle. This creates a clean, pointed tip instead of a frayed end.
- Moisten the thread end slightly — just touch it to your tongue. This holds the fibers together and makes the tip firmer.
- Hold the thread between your thumb and forefinger so only 2–3mm of the tip protrudes.
- Position the needle so good light (ideally from behind the needle) shines through the eye.
- Push the thread through the needle eye from front to back on most machines. Some older Singer models thread from left to right — check your manual.
- Pull about 6 inches of thread through the eye.
Using the Automatic Needle Threader
Most machines made in the last 20 years include an automatic needle threader — a small hook mechanism that passes a wire loop through the needle eye and captures the thread for you. The exact operation varies slightly by machine, but the general process is:
- Ensure the needle is at its highest position (a required step for most auto threaders to engage).
- Lower the presser foot.
- Pass the thread through the thread guide just above the needle, then hook it around the small wire pin at the front of the threader mechanism.
- Push the threader lever down slowly — the small hook pushes through the needle eye.
- Release the lever slowly — the hook pulls a loop of thread back through the needle eye.
- Pull the loop so the loose end of thread comes through, leaving a 6-inch tail.
After threading the needle, pull about 6 inches of thread through the eye and leave it hanging loosely to the rear or left of the needle. This tail is essential — without it, the thread will pull back through the needle on the first stitch.
For more on needles specifically — sizes, types, and when to change them — see our comprehensive guides on sewing machine needle sizes and whether needles are universal.
Step 8 – Bringing Up the Bobbin Thread
This is the moment everything comes together. After threading the needle, you need to bring the bobbin thread up through the needle plate so both threads are accessible on top of the machine. Here’s how:
- Hold the needle thread: Grasp the needle thread tail with your left hand and hold it with light tension — don’t let go.
- Turn the handwheel: With your right hand, turn the handwheel toward you (counterclockwise when viewed from the right side). This lowers the needle down through the needle plate, into the bobbin area, where the needle hook catches the bobbin thread loop.
- Continue turning: Keep turning until the needle comes back up. As it rises, you’ll see a loop of bobbin thread coming up through the hole in the needle plate, pulled by the needle thread.
- Pull the loop: Use a seam ripper, small scissors tip, or your finger to pull the loop up through the needle plate hole, revealing the bobbin thread tail.
- Pull both threads back: Grasp both the needle thread and the bobbin thread and pull them both toward the back of the machine (or to the left, under the presser foot). Leave at least 6 inches of both threads pulled free.
Now lower the presser foot, position your fabric, and you’re ready to sew your first test stitch.
If thread keeps nesting under the fabric when you start sewing, pull both thread tails much further back before beginning — at least 6 inches. Short tails get sucked into the bobbin area immediately and create jams. This is covered in detail in our guide on fixing thread nesting under fabric.

Singer Heavy Duty 4423 – Easy Threading, Powerful Motor
Clear threading path, built-in needle threader, and fast 1,100 SPM motor. One of the most beginner-friendly machines for learning the threading process.
Check Price on AmazonHow to Thread Specific Sewing Machine Brands
While the general threading path is similar across machines, each brand has small quirks, different guide placements, and unique bobbin systems. Here’s what you need to know for the four most popular brands.
Threading Brother Sewing Machines
Brother is one of the most popular sewing machine brands for beginners, and their threading systems are among the clearest. Almost every Brother machine has the threading path color-coded in yellow or printed with numbered guides directly on the machine face.
Key Threading Features
Bobbin type: Top-load (Class 15J or SA156) — drop the bobbin in and follow the diagram printed in the bobbin area. The transparent cover makes it easy to see if thread is running correctly.
Threading path: Typically guides 1→2→3→4 printed on the machine in yellow markings. Guide 4 is the take-up lever hook. Follow numbers top to bottom, then up to the lever, then back down to the needle.
Needle direction: Front to back on all Brother models. The auto needle threader requires the thread to pass through guide 5 (the small wire loop just above the needle clamp) first.
See our reviews of Brother CS6000i, Brother CS7000X, and our comparison of the CS6000i vs CS7000X for threading-related differences between models.
Threading Singer Sewing Machines
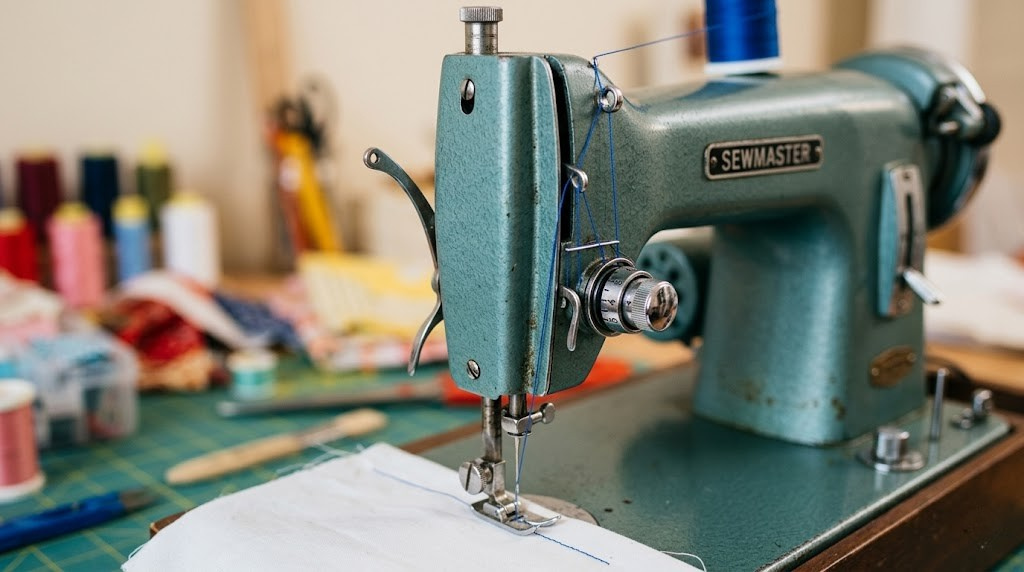
Singer has been making sewing machines since 1851, and their threading path has evolved considerably. Modern Singers are very similar to other brands, but older models (especially vintage Singers from the 1950s–80s) have unique threading paths that often confuse sewists used to modern machines.
Key Threading Features
Modern Singer (Heavy Duty 4423, 4452, Quantum Stylist): Top-load bobbins, front-to-back needle threading, numbered guides. Very similar to Brother threading.
Vintage Singer (Featherweight, 99, 201): Front-load oscillating shuttle or transverse shuttle bobbin systems. Threading is significantly different — the bobbin case loads from the front, and the needle threads from left to right on many older models.
Important Singer quirk: Some Singer models have the tension disc mechanism on the left side of the machine rather than at the front. Follow the printed arrows carefully.
See our reviews of Singer Heavy Duty 4452 and Singer Start 1304, as well as our comparison of Singer 4411 vs 4423.
Threading Janome Sewing Machines
Janome machines are known for smooth, precise sewing and excellent build quality. Their threading systems are logical and clearly marked, but Janome uses a few features that are slightly different from Brother and Singer.
Key Threading Features
Bobbin type: Most modern Janome machines use the Janome/New Home 7mm bobbins (top-load). Some older models use front-load Class 15 bobbins.
Threading path: Color-coded in pink/red on most models. Janome is known for a very smooth tension disc mechanism — thread seats firmly and you’ll feel clear resistance when correctly placed.
Bobbin insertion direction: Janome drop-in bobbins insert with the thread unwinding counterclockwise on most models. The bobbin area typically has a printed “J” curve showing the thread path through the bobbin slot.
Check our detailed reviews of Janome HD3000, Janome JW8100, and comparison of Janome HD1000 vs HD3000.
Threading Bernina Sewing Machines
Bernina machines are premium Swiss-engineered machines favored by professional sewists. Their threading systems are more involved than consumer-grade machines and require more careful attention, but once learned, are extremely reliable.
Key Threading Features
Bobbin type: Bernina uses their own unique front-loading hook system. The bobbin is inserted into a rotating hook assembly — you’ll need the specific Bernina hook-style bobbin case and Bernina bobbins for your model series.
Threading path: Bernina machines often have more thread guides than most consumer machines. The path includes specific tension guides that must all be engaged for correct tension. The machine’s threading is typically illustrated in detail in the manual rather than printed on the machine itself.
BSR (Bernina Stitch Regulator): On models with BSR, threading doesn’t change, but be aware the foot attachment affects thread path slightly.
Read our in-depth Bernina sewing machine reviews and our comparison of Bernina vs Janome stitch regulator performance.
| Brand | Bobbin Type | Thread Path Guide | Needle Direction | Auto Threader? | Difficulty |
|---|---|---|---|---|---|
| Brother | Top-load (drop-in) | Numbered 1–4+ in yellow | Front to back | ✓ Most models | ⭐ Easy |
| Singer (modern) | Top-load (drop-in) | Numbered guides + arrows | Front to back | ✓ Most models | ⭐ Easy |
| Singer (vintage) | Front-load (bobbin case) | Manual / printed arrows | Left to right | ✗ | ⭐⭐⭐ Moderate |
| Janome | Top-load (most models) | Color-coded in pink | Front to back | ✓ Most models | ⭐ Easy |
| Bernina | Front-load (Bernina hook) | Manual / detailed guides | Front to back | ✓ Mid/High range | ⭐⭐ Moderate |
| Juki (home) | Front-load or top-load | Numbered guides | Front to back | ✓ Most models | ⭐⭐ Moderate |
| Husqvarna Viking | Top-load (drop-in) | Color-coded + Sewing Advisor | Front to back | ✓ Most models | ⭐ Easy |
Bobbin Types Explained: Which Bobbin Does Your Machine Use?
One of the most confusing aspects of sewing machine threading is bobbin compatibility. Not all bobbins work in all machines — using the wrong bobbin is a common cause of thread tension problems and jams. Bobbins vary in diameter, height, and whether they’re plastic or metal. Here’s a quick guide to the most common types:
| Bobbin Class | Also Known As | Common Machines | Load Type | Material |
|---|---|---|---|---|
| Class 15 | SA156, Standard | Many Brother, older Singer | Top-load or front-load | Plastic or metal |
| Class 15J | Jumbo | Most modern Brother machines | Top-load | Plastic |
| Class 66 | L-style, Low-shank | Many vintage Singers, some Janome | Front-load or top-load | Metal (vintage) or plastic |
| L-style | Class 66 | Janome, Elna, some Bernette | Top-load | Plastic |
| M-style (large) | Class 15 XL | Some Janome, Viking | Top-load | Plastic |
| Bernina Type | Model-specific | Bernina machines | Front-load (hook type) | Metal |
| Juki (industrial) | Class 16 | Juki industrial machines | Front-load | Metal |
To find the right bobbin for your specific machine, check the machine manual or look for the model number on the manufacturer’s website. Many machines also have the bobbin class printed inside the bobbin compartment itself. If you own a mechanical sewing machine, older metal bobbins typically work better for consistent tension on heavier fabrics.
Troubleshooting Threading Problems: Complete Diagnostic Guide
Even when you follow every step correctly, threading issues can arise. This section covers every common threading-related problem, its cause, and the fix. Before assuming your machine is broken, work through this guide systematically — the vast majority of sewing machine problems are threading related.
For comprehensive machine troubleshooting beyond just threading, see our complete sewing machine troubleshooting guide and our dedicated article on why your sewing machine isn’t sewing.
| Symptom | Most Likely Cause | Fix |
|---|---|---|
| Thread breaks immediately | Threaded with presser foot down; take-up lever missed; tension too tight; old thread | Re-thread from scratch with foot UP. Check take-up lever. Reduce tension. Replace old thread. |
| Loops under the fabric (bird’s nesting) | Upper thread not seated in tension discs (almost always) | Re-thread completely with presser foot raised. Make sure thread goes through the U-turn in the tension mechanism. |
| Loops on top of fabric | Bobbin not threaded correctly; bobbin in wrong direction; bobbin thread not through slot | Remove bobbin, re-insert in correct direction, ensure thread passes through all slots in bobbin area. |
| Skipped stitches | Needle not fully inserted; needle bent; wrong needle for fabric; machine not threaded through needle bar guide | Replace needle. Push it fully up into clamp. Use correct needle type. Check all guides near needle. |
| Bobbin thread not coming up | Upper thread not held when turning handwheel; bobbin not in correctly; needle thread not in take-up lever | Hold upper thread taut. Re-insert bobbin. Re-thread upper path. Turn handwheel slowly toward you. |
| Machine jams after threading | Thread tails too short; thread not pulled behind presser foot; bobbin area improperly threaded | Pull both thread tails 6″+ to the back/rear before starting. Ensure bobbin area is clear. |
| Thread pulls out of needle immediately | Thread tail too short after threading needle; sewing started in wrong direction | Pull 6″ of thread through needle. Hold threads behind presser foot when starting first stitch. |
| Uneven tension top vs bottom | Thread not fully seated between tension discs; wrong tension setting; wrong bobbin | Re-thread with foot UP. Check tension setting (default 4–5). Use correct bobbin for your machine. |
| Thread shredding/fraying at needle | Needle eye too small for thread; needle point damaged; thread caught on burr | Use correct needle size for thread weight. Replace needle. Check eye for burrs with magnifying glass. |
| Machine makes grinding noise | Thread wrapped around bobbin case or feed dogs; wrong bobbin size | Clear thread from under needle plate. Use correct bobbin. Oil machine if needed. See machine oiling guide. |
The Universal Fix: Re-Thread From Scratch
When in doubt, re-thread. Experienced sewists who encounter any threading-related problem don’t waste time diagnosing the specific cause — they simply re-thread the entire machine from the beginning, following every guide, with the presser foot raised. This solves approximately 90% of all sewing machine problems that aren’t mechanical in nature.
The re-thread protocol:
- Raise the presser foot lever
- Raise the needle to its highest position
- Remove the thread from the needle and all upper guides
- Remove the bobbin from the machine
- Check the bobbin for correct winding (even, 80% full)
- Reinsert the bobbin in the correct direction
- Re-thread the upper path following the numbered guides
- Thread the needle
- Bring up the bobbin thread
- Pull both tails 6″ to the back
- Test on scrap fabric

Janome HD3000 Heavy-Duty Machine
Rated 4.8/5 by thousands of sewists. Clear threading path, robust tension system, and reliable stitch quality even through thick fabrics. Zero threading confusion.
Check Price on AmazonAdvanced Threading Tips, Tricks, and Best Practices
Once you’ve mastered basic threading, these advanced tips will help you thread faster, more consistently, and troubleshoot like an expert. These are the techniques experienced sewists use that beginner guides never mention.
Changing Thread Color Mid-Project
When you need to change thread color without re-threading from scratch, use the thread-follow technique: cut the old thread near the spool, tie the new thread to the old thread tail with a small knot, and slowly draw the old thread through all the guides by pulling from below the needle. The new thread follows the old path automatically. Trim the knot carefully when it reaches the last guide above the needle, then thread the needle manually.
This technique saves significant time on projects requiring frequent color changes. Note: it doesn’t work well with the automatic needle threader — thread the needle manually when using this method.
Threading for Different Fabrics and Techniques
| Fabric/Technique | Thread Recommendation | Needle | Tension Note |
|---|---|---|---|
| Lightweight silk/chiffon | Fine silk or 60wt polyester | Size 60/8 or 70/10 microtex | Reduce tension slightly (3–4) |
| Medium cotton | 50wt cotton or all-purpose polyester | Size 80/12 universal | Default (4–5) |
| Denim/heavy canvas | 40wt polyester or denim thread | Size 90/14 or 100/16 denim | May need slight increase (5–6) |
| Stretch/knit fabrics | Wooly nylon or polyester stretch thread | Size 75/11 stretch or ballpoint | Reduce tension (3–4), use zigzag stitch |
| Quilting | 50wt cotton quilting thread | Size 75/11 or 80/12 quilting | Default (4–5) |
| Machine embroidery | 40wt embroidery thread (polyester or rayon) | Size 75/11 embroidery | Reduce upper tension (2–3) |
| Decorative topstitching | 30wt or 40wt topstitching thread | Size 100/16 topstitching | May need topstitch needle’s larger eye |
For more on thread selection, see our comparison of polyester vs cotton thread, our guide on whether embroidery thread can be used for regular sewing, and our roundup of the best cotton threads.
Threading a Twin Needle
Twin needles allow you to sew two parallel rows of stitching simultaneously — they’re popular for hemming knit fabrics and decorative work. Threading a twin needle requires two spools of thread and a slightly different upper threading approach:
- Insert the twin needle (both needles on the same shank bar, not in different clamps).
- Place two spools of thread — one on the main spool pin and one on an auxiliary spool pin (or a horizontal spool holder accessory).
- Thread both spools through the upper threading path together until you reach the take-up lever and needle.
- Just before the needle, separate the two threads — one to each needle eye.
- Keep tension at the lower end of normal — twin needles can cause tunneling if tension is too tight.
Threading for the Serger / Overlocker
Sergers (overlockers) use 3–5 threads simultaneously and have one of the most complex threading systems of any sewing machine. Each thread has its own color-coded path, and they must be threaded in the correct order (usually back to front, or in the order printed on the machine). If you’ve only threaded regular sewing machines, a serger will feel complex at first — but the logic is the same: follow the color-coded guides in order.
Our complete guide to what a serger sewing machine is and how it works explains the threading system in detail. Also see our comparison of serger vs coverstitch machines.
Maintaining Your Machine for Easy Threading
A well-maintained machine is easier to thread and produces better stitches. The key maintenance tasks that directly affect threading:
- Clean lint from tension discs: Lint trapped between the tension discs prevents thread from seating properly. Use a soft brush to clean the disc area regularly — every 8–10 bobbins of thread used.
- Oil the machine: A dry machine runs roughly and can cause thread to snag on guide hooks. See our complete guide to how to oil a sewing machine.
- Replace needles regularly: A dull needle shreds thread. Change needles every 8–10 hours of sewing time or at the start of each new project. Our needle problems guide covers every needle-related threading issue.
- Check guides for burrs: Metal thread guides can develop small burrs or rough spots over time that fray thread. Run your fingertip over guides occasionally — if you feel roughness, report it to a technician.
For a complete approach to machine setup, see our sewing machine setup checklist and our guide to sewing machine safety tips.

Schmetz Universal Needle Assortment — 30 Pack
Having the right needle is half the threading battle. This assorted set covers sizes 70/10 through 100/16 for all fabric types — always have the correct needle on hand.
Check Price on AmazonQuick-Reference Threading Checklist
☑ Complete Threading Checklist
- ☐ Presser foot lever raised
- ☐ Needle at highest position
- ☐ Bobbin wound evenly, 80–90% full
- ☐ Bobbin inserted in correct direction
- ☐ Bobbin thread through all slots in bobbin area
- ☐ Spool placed correctly with spool cap
- ☐ Thread through all numbered upper guides in order
- ☐ Thread seated in tension discs (U-turn made)
- ☐ Thread through take-up lever hook
- ☐ Thread through needle bar guide
- ☐ Needle threaded front-to-back (or per manual)
- ☐ 6″ thread tail through needle
- ☐ Bobbin thread brought up and pulled to back
- ☐ Both thread tails 6″+ behind presser foot
- ☐ Test stitch on scrap fabric — even tension both sides
Understanding Tension After Threading
Once the machine is threaded, tension determines stitch quality. Tension affects how much the upper thread is pulled — and is directly related to how well the thread is seated in the guides and tension discs during threading. If tension looks uneven after correct threading, here’s the diagnostic approach:
- Top thread visible on underside: Upper tension too tight, or bobbin not threaded properly. First re-thread bobbin; if still happening, reduce upper tension one step at a time.
- Bobbin thread visible on top: Upper tension too loose, or upper thread not in tension discs. Re-thread upper path with foot raised; if still happening, increase upper tension slightly.
- Both sides look even but thread breaks: Tension may be correct but thread is old, wrong weight, or the needle is the wrong size. See our guide on needle sizes.
For more in-depth coverage of how stitch settings relate to threading, see our guide to stitch width vs length and our article on seam allowance in sewing.
Frequently Asked Questions About Threading a Sewing Machine
Thread breakage right after threading almost always comes down to one of four causes: you threaded the machine with the presser foot down (most common — the tension discs were closed so thread didn’t seat between them); you missed the take-up lever; you’re using old, brittle thread that has weakened over time; or the tension is set too high for the thread weight.
The fix: re-thread the entire machine from scratch with the presser foot raised. Follow every numbered guide. If it still breaks, try fresh thread or reduce the tension setting by one or two steps.
Yes, it matters. Most modern sewing machines — including all current Brother, Singer, Janome, and Bernina models — thread the needle from front to back. This means you push the thread toward the back of the machine through the needle eye.
However, some older Singer models (particularly vintage Featherweights and treadle machines) and a few other vintage brands thread from left to right. Always check your machine’s manual if you’re unsure. Threading in the wrong direction causes the thread to pull out of the needle immediately when sewing begins.
The bobbin thread won’t come up through the needle plate for several reasons: the bobbin was inserted with thread unwinding in the wrong direction; the thread in the bobbin compartment wasn’t pulled through the slot/guide in the bobbin area cover; the upper thread wasn’t properly held taut while turning the handwheel; or the bobbin case/carrier isn’t fully seated and clicked into position.
Also confirm you’re turning the handwheel in the correct direction — toward you (counterclockwise from the right side). Turning it away from you moves the needle incorrectly and may cause the timing to be off.
No — if your machine was correctly threaded and you’re continuing the same project with the same thread, you don’t need to re-thread before each sewing session. However, re-threading is recommended in these situations: you’re changing thread color or type; there was a thread breakage or jam; you changed the needle; you’ve been having stitching problems; or the machine has been stored for several months (thread can weaken or settle oddly).
Many experienced sewists re-thread routinely at the start of each major project as a good habit — it takes only 2–3 minutes and eliminates a large category of potential problems before they start.
Manual needle threading is easiest when you: use sharp scissors to cut the thread at a sharp 45-degree angle (not straight across); moisten the thread tip slightly to hold the fibers together; hold the thread between your thumb and forefinger so just 2–3mm protrudes; and position a strong light source behind the needle so it shines through the eye toward you.
If your eyesight makes this difficult, a hand-held needle threader (a small wire loop tool available for $1–3) makes the job simple — it works on sewing machine needles just as well as hand needles.
The general concept is the same — thread travels from the spool through a series of guides and tension discs, through the take-up lever, and down to the needle — but the exact routing varies significantly by brand and even by model within the same brand. The number of guides, their positions, and the bobbin system all differ.
Brother machines are typically the most beginner-friendly with color-coded numbered guides. Bernina machines have more guides and a unique bobbin system. Vintage machines from any brand often have completely different paths from their modern successors.
Thread bunching under the fabric — called “bird’s nesting” because the tangle looks like a bird’s nest — is almost exclusively caused by incorrect upper threading. Specifically, the thread is not seated between the tension discs, which happens when the machine is threaded with the presser foot in the lowered position.
The fix is simple but complete: remove all the thread from the needle and every upper guide, raise the presser foot lever, and re-thread the machine carefully from the start, ensuring the thread makes the U-turn through the tension disc area. After re-threading, test on scrap fabric with both thread tails pulled 6 inches behind the presser foot before starting.
The take-up lever is the metal hook-shaped arm at the front of the machine that moves up and down as you sew. It performs two essential jobs: it pulls thread off the spool to supply material for each stitch, and it pulls the formed stitch tight against the fabric after the needle rises. Without the take-up lever correctly threaded, the machine has no mechanism to control the flow of thread.
Skipping the take-up lever is one of the most common threading mistakes — it causes thread to break within the first few stitches (when all available slack is used up) or produces hopelessly loose, looping stitches. Always thread with the take-up lever at its highest position (needle at top of stroke).
Most standard home sewing machines can handle polyester all-purpose thread, cotton all-purpose thread, and most specialty threads designed for home sewing machines. However, you should avoid: hand-embroidery floss (too thick and textured for machine guides); very heavy craft thread that may not fit through guides; metallic thread without using the correct metallic needle and lowered tension settings; and elastic thread in the needle (elastic thread only goes in the bobbin, wound by hand).
Match thread weight to fabric weight as a general rule — fine thread on lightweight fabrics, heavier thread on denim and canvas.
Four signs of correct threading: (1) When you pull the thread from the spool end, you feel slight, consistent resistance — not free-flowing, not so tight it won’t move. (2) Turning the handwheel slowly brings the bobbin thread up as a loop through the needle plate hole. (3) Both upper and bobbin threads can be pulled smoothly under the presser foot to the back of the machine. (4) Most importantly, test stitches on scrap fabric show even tension on both sides — no loops visible on either the top or the bottom of the fabric.
Jamming immediately after threading is most often caused by thread tails that are too short or not positioned correctly. Both thread tails (needle thread and bobbin thread) must be pulled at least 6 inches out from the machine and positioned behind the presser foot before you start sewing. If they’re too short, they get pulled into the bobbin area with the first stitch and cause an immediate jam.
Secondary causes: the bobbin thread was not brought up before sewing began; the bobbin was inserted incorrectly; or thread wasn’t cleared from a previous jam. See our guide on why sewing machines jam for complete diagnostic steps.
When correctly threaded (with presser foot raised), you should feel light but clear resistance as you pull the thread from above the needle — similar to the gentle pull of a tensioned thread in hand sewing. The thread should not slide completely freely (meaning it hasn’t seated between the tension discs), and it shouldn’t be so tight it won’t move at all (meaning it’s caught somewhere incorrectly).
With the presser foot lowered and tension discs engaged, resistance will increase noticeably. This is correct — the discs are working. The thread should still be movable but require definite effort to pull.
You’ve Got This: Threading Is a Skill, Not a Talent
Threading a sewing machine feels overwhelming the first time — there are so many guides, the path isn’t immediately obvious, and the stakes feel high. But as this guide has shown, the process is entirely logical once you understand why each step exists. The thread guides route the thread reliably. The tension discs control how much thread feeds into each stitch. The take-up lever pulls thread off the spool and tightens each stitch. And the bobbin provides the lower half of the interlocked stitch structure.
Once you understand these fundamentals, threading isn’t just a mechanical task — it’s a moment to engage with how your machine actually works. And that understanding makes you a better sewist overall, because you can diagnose problems quickly and solve them confidently.
The eight steps in this guide work for virtually every sewing machine ever made: raise the presser foot, wind and insert the bobbin, place the spool, thread through the numbered guides, seat the thread in the tension discs, thread the take-up lever, thread the needle, and bring up the bobbin thread. Practice these steps three or four times in a row and they become instinctive.
If you’re just getting started with sewing, pair this guide with our complete tutorial on how to use a sewing machine, our machine setup checklist, and our sewing machine buying guide if you’re still choosing a machine. If you’re expanding into quilting, see our resources on quilting cutting mats, quilting rulers, and the best rotary cutters for quilting.
Ready to Sew? Explore More Guides
Now that your machine is perfectly threaded, dive into our full library of sewing tutorials, machine reviews, and project guides — everything you need to sew with confidence.
Browse All Sewing Guides →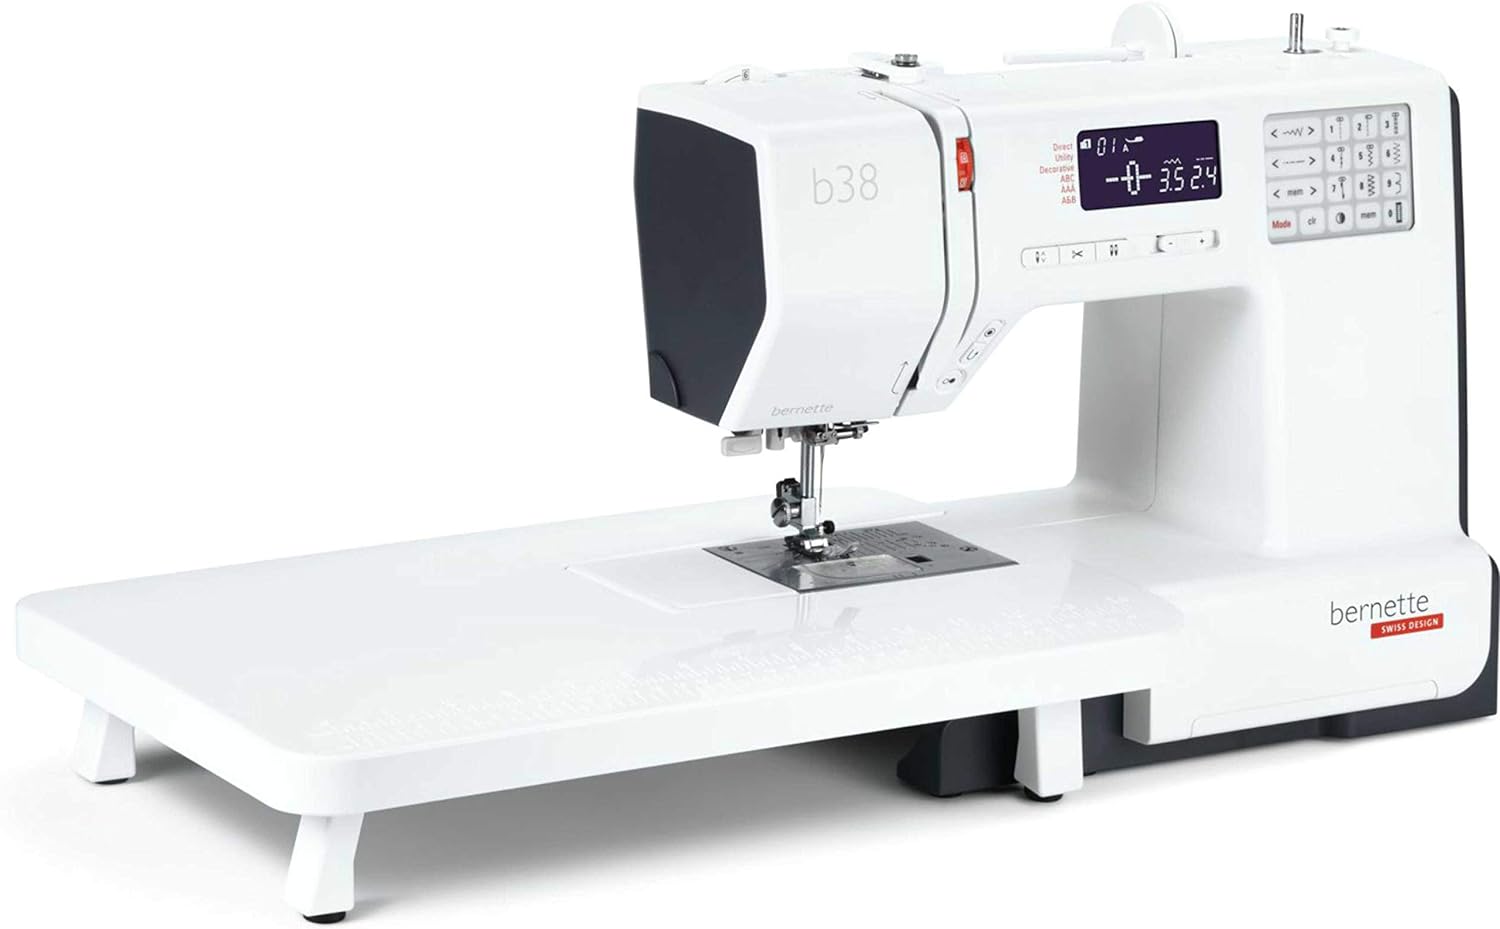
bernette b38 Computerized Sewing Machine
Swiss-engineered with a clear, logical threading system. Automatic needle threader, drop-in bobbin, and 200+ stitches — an excellent machine for sewists ready to level up.
Check Price on Amazon